- Start page
- NEWly buily paintcan furnace June 2020
- Newly buily barrel furnace June 2018
- Videos from several experiments
- Home made fume hood
- Alloying nickel silver
- Making sphecical domes of silver
- Making a flat ring of silver
Homemade electric melting furnaceVideosBuilding of a new Kanthal furnace December 2020: Part 1: Construction Building of a new Kanthal furnace December 2020: Part 1: Construction Building of a new Kanthal furnace December 2020: Part 1: Construction
Building of a new Kanthal furnace December 2020: Part 2: Test and running Building of a new Kanthal furnace December 2020: Part 2: Test and running
Test case on small Kanthal furnace 2019 Jan 10 A test run using a 20-24V DC power supply powering 1.5mm Kanthal coil.
Copper melting in a Kanthal furnace 2016 Oct 25 with success A test run of the furnace melting 100g of copper with timelapse.
Introduction Click on the image to go to the Kanthal site where you can download specifications on Kanthal wire and heating elements.
This document describes how to build a furnace for melting metals like copper, silver, gold, etc. As a metal container a primarily used for metal melting and heat treatment until 1200oC and based upon resistance heating. As a hobby silversmith I regularly do casting and sometimes heat treatment of metals. But this description can be useful as well for other users of furnaces in the range around 1000oC such as glassblowers, enamelers and potters. Here the differences with a gas fired furnace and other types of electrical furnaces will be described, the safety issues and how to build an electric furnace with resources available in the local hardware shop. All units are expressed in metric and approximate prices in US dollars, unless stated otherwise. Electrical furnaces versus gas
For metal melting purposes, a gas furnace has usually a cilindrical chamber in which a crucible is placed with the metal in it. The gas burner has a tangential input to allow the flame to circle around the crucible. Using propane with air, the heating goes rather quick when using well-insulating refractory: 15 minutes to
1300oC with a small furnace with chamber of 250 cc. A descriptive site on this can be found as well. But lots of heat and energy get lost, unless (usually in an industrial environment) gas fuel preheating and recovery of exhaust heat takes place. But this is very hard to achieve in a hobby environment. Moreover, temperature control is not as good as in electrical furnaces, unless an (expensive) controlled valve for the gas supply is used. Moreover, using a fuel limits the temperature to the flame temperature of the fuel, regardless the quality of insulation used. This flame temperature is limited by physical and thermodynamic laws, which means that e.g. propane-air can never get hotter than, say, 1450oC. So, e.g. melting cast iron or steel in a gas fired furnace, requiressome additional oxygen. Electrical furnaces, regardless of type are limited only in temperature by heating element and refractory type.
The latter is being described here more extensively. When temperatures used to about 1200oC are
required (and sometimes to 1600oC in the glass industry), in many cases gas heating is quicker and
(in some cases) more energy-efficient. The latter is true when the electricity is generated in a thermal
(fossil fuel) power station with an efficiency of only 45%: besides the losses of the electric heater itself,
55% of primary energy is wasted in the river or cooling tower. But when the use renewable electrical
energy they are far more efficient.
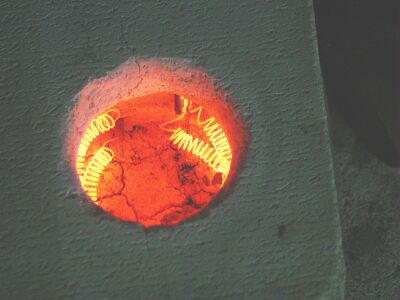
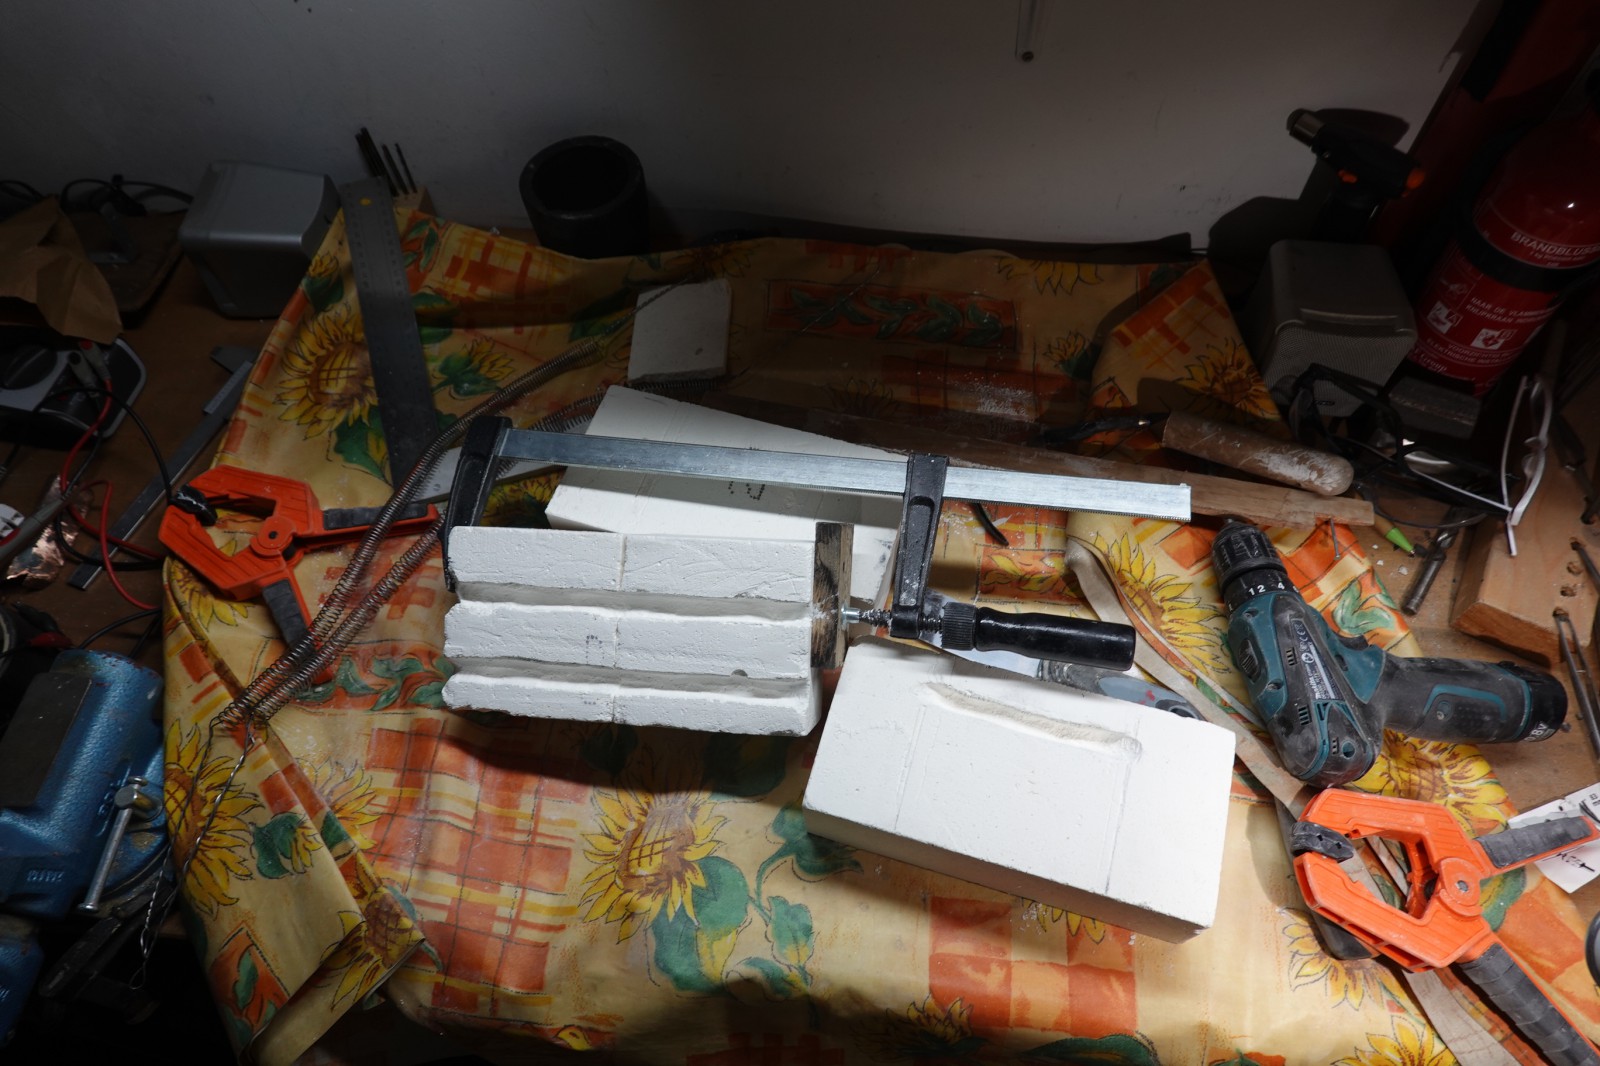
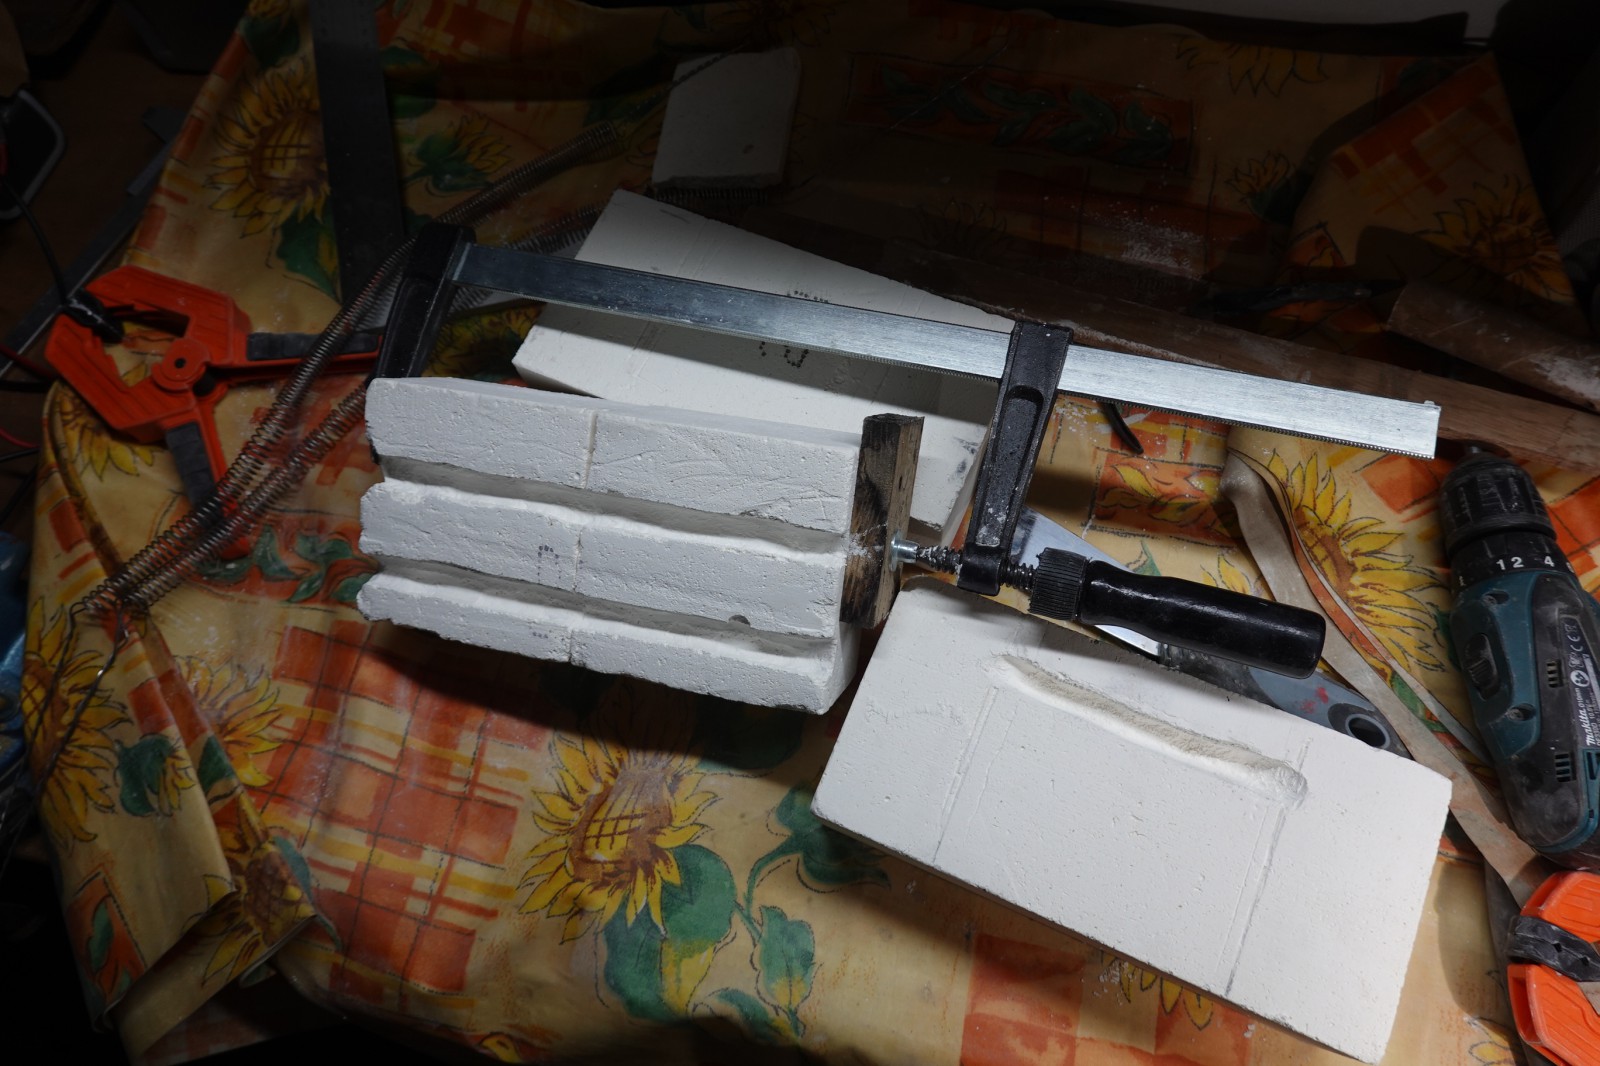
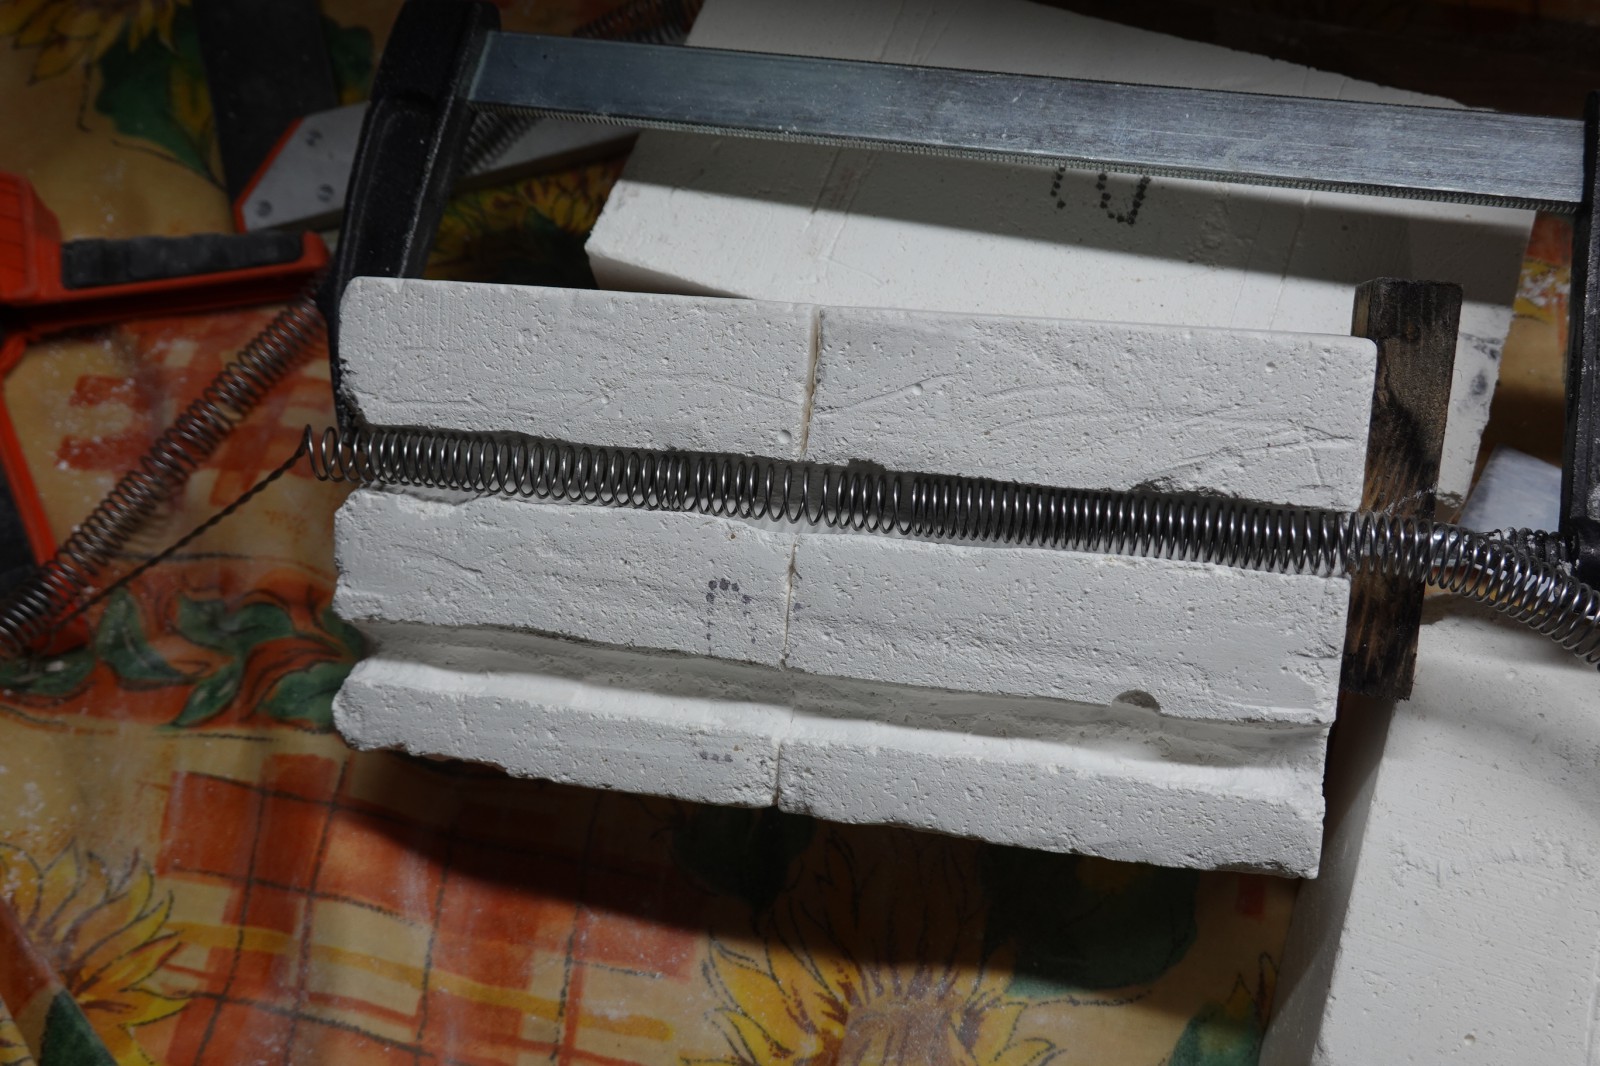
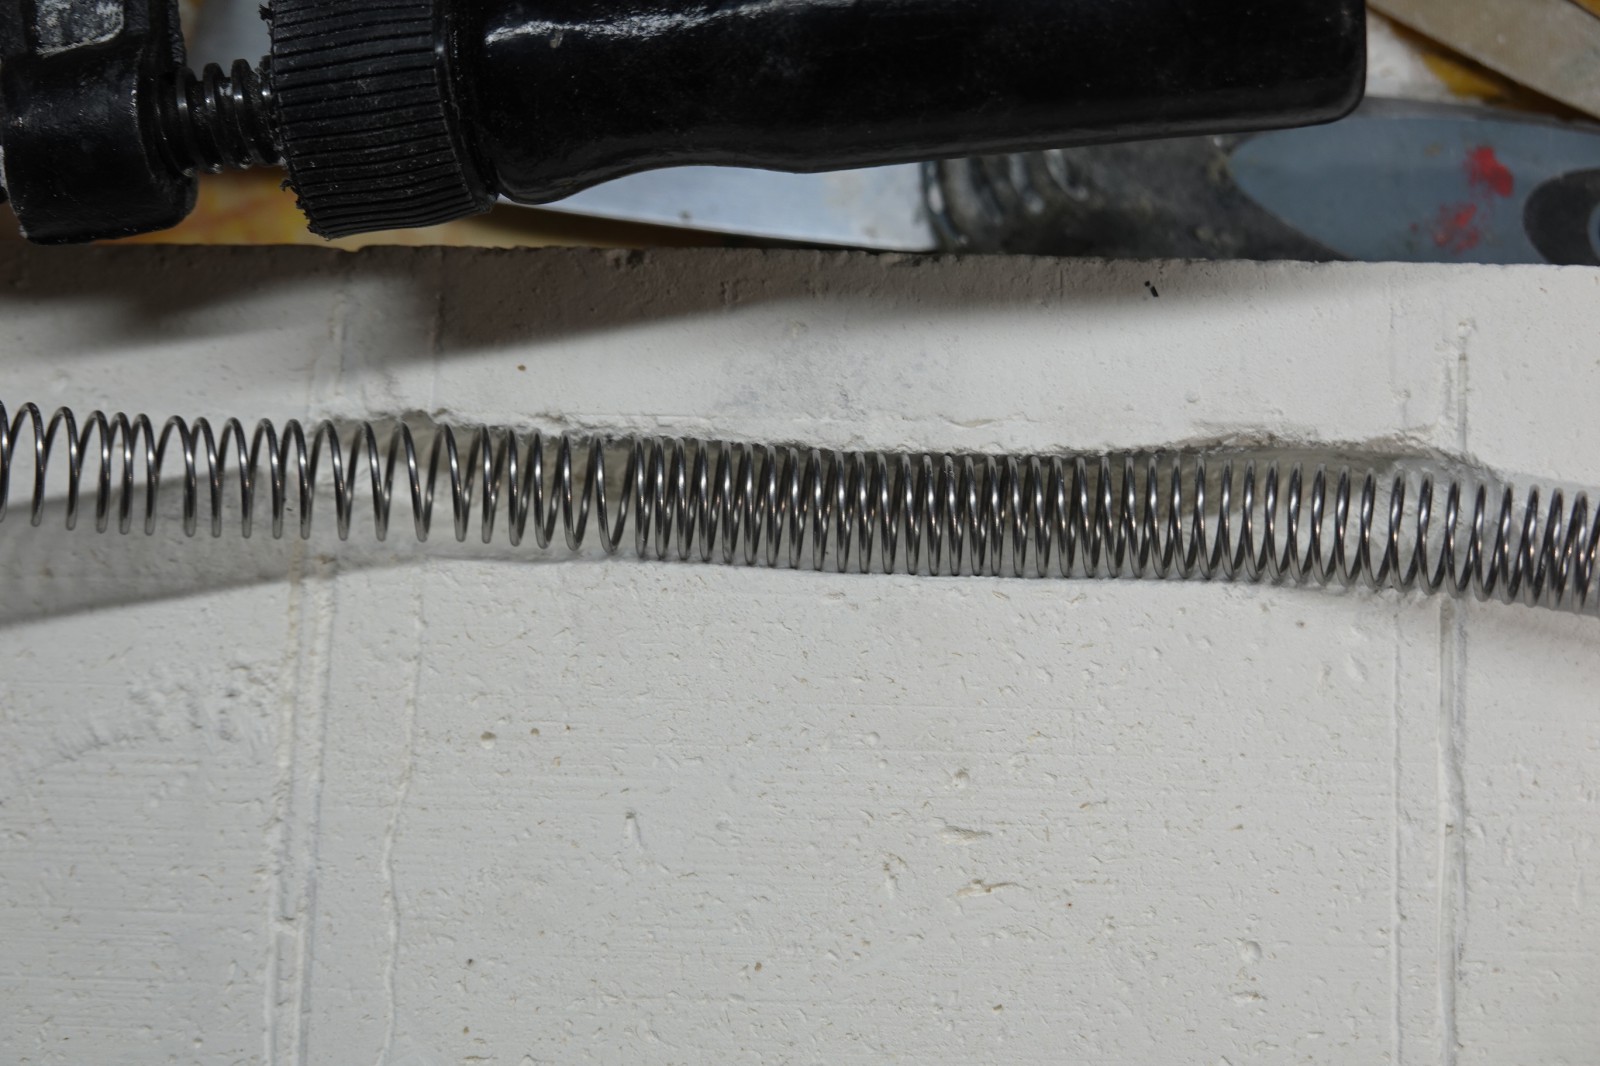
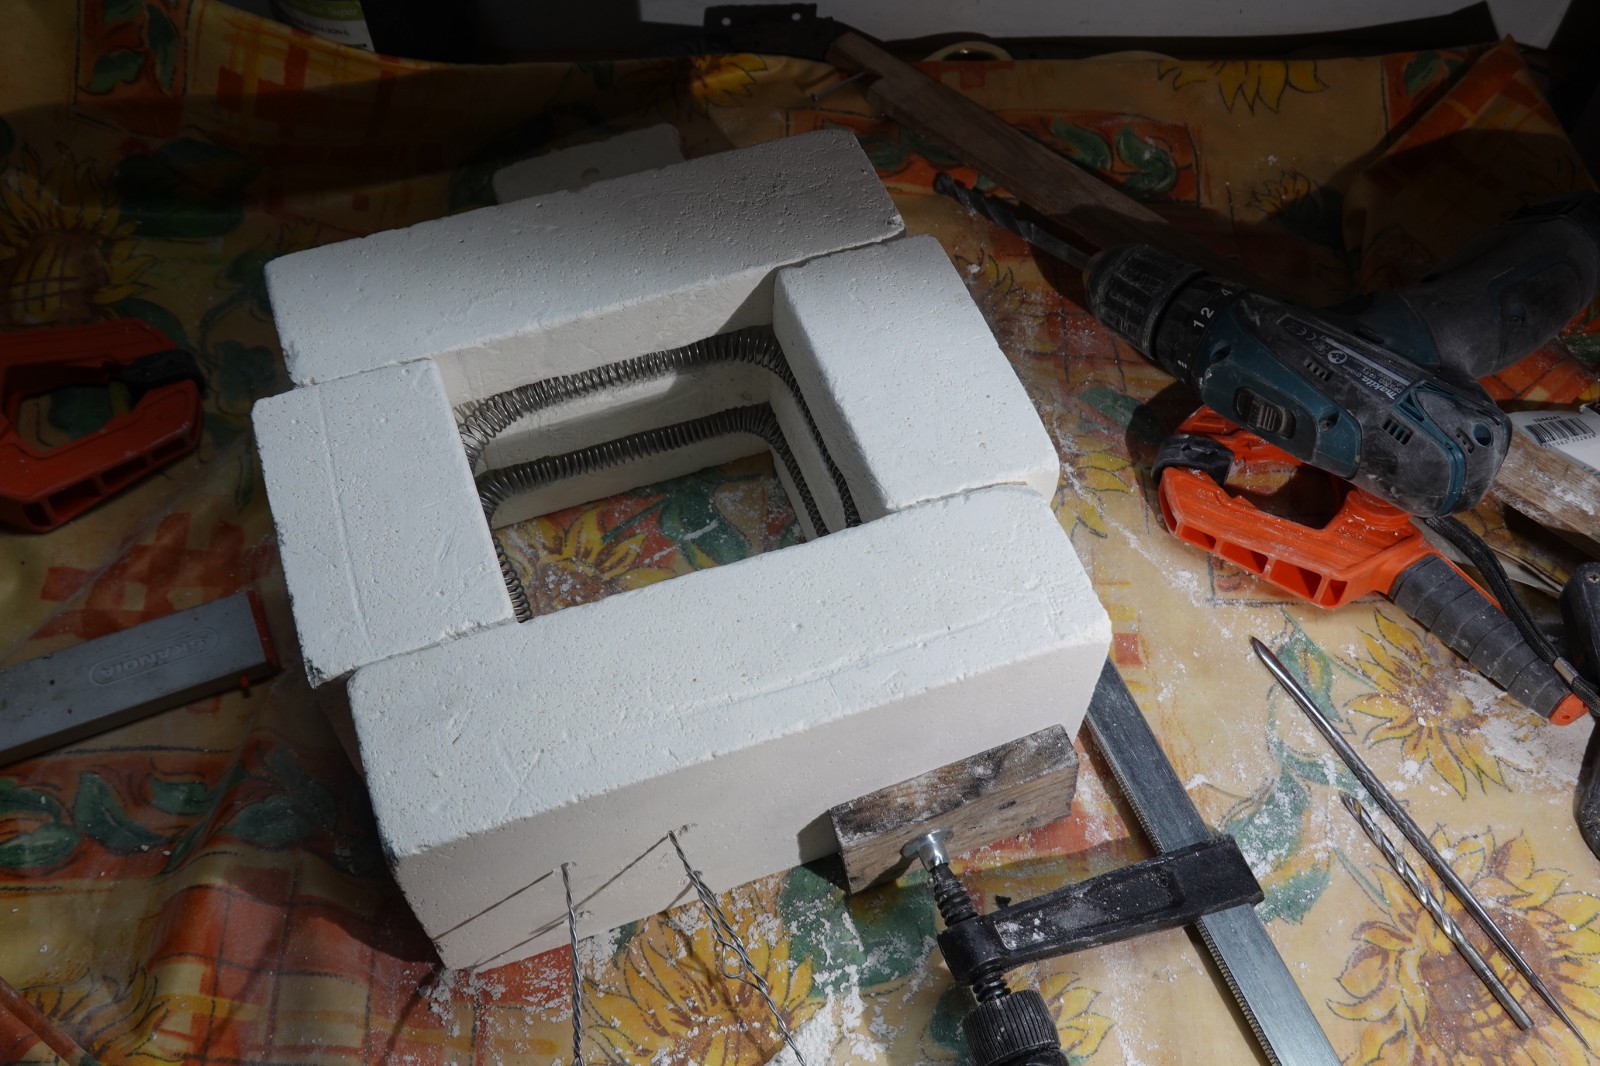
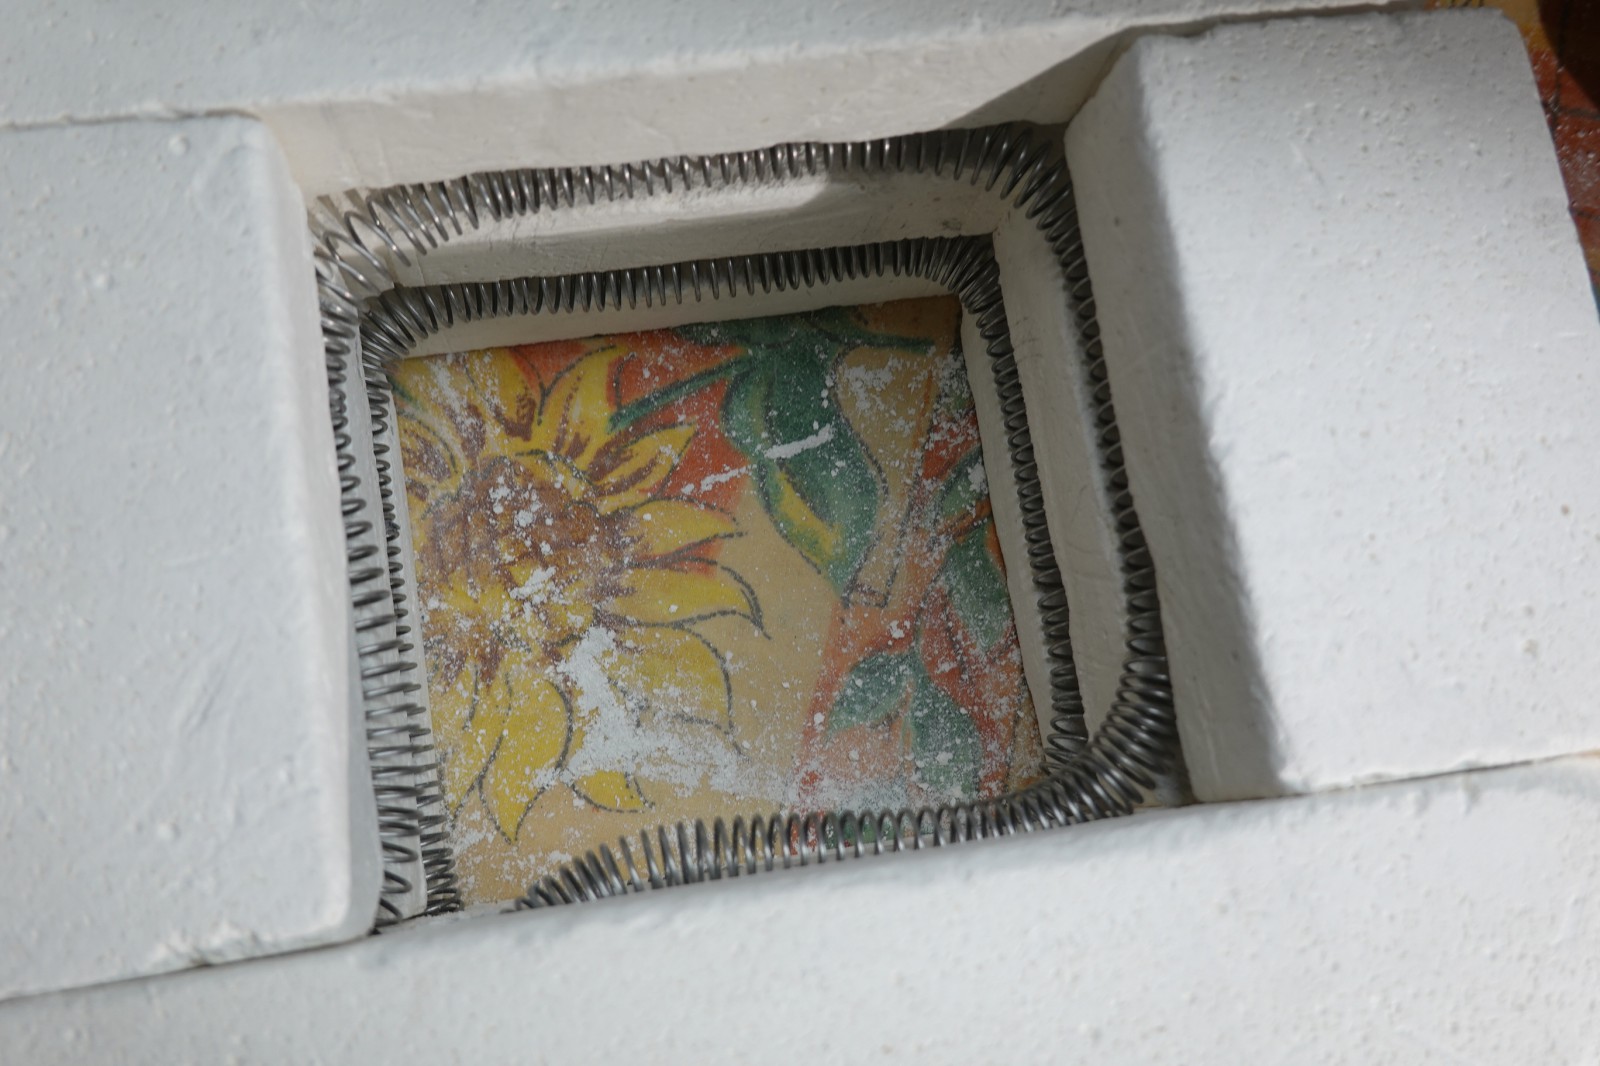
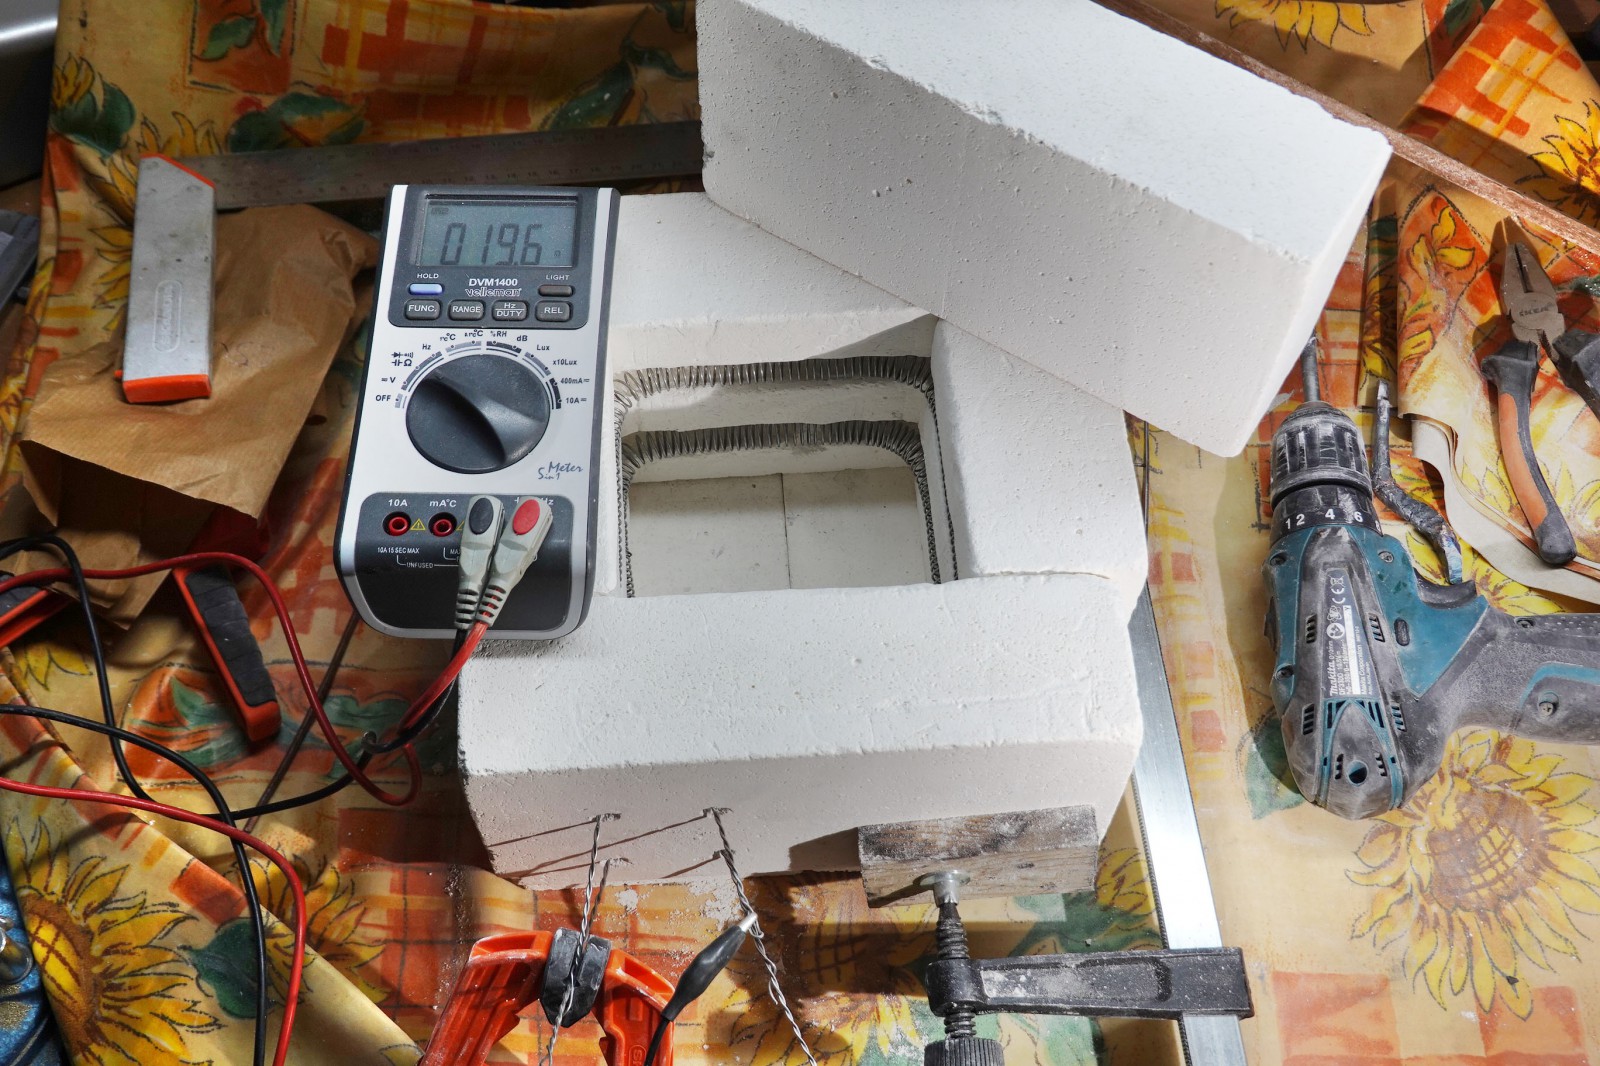
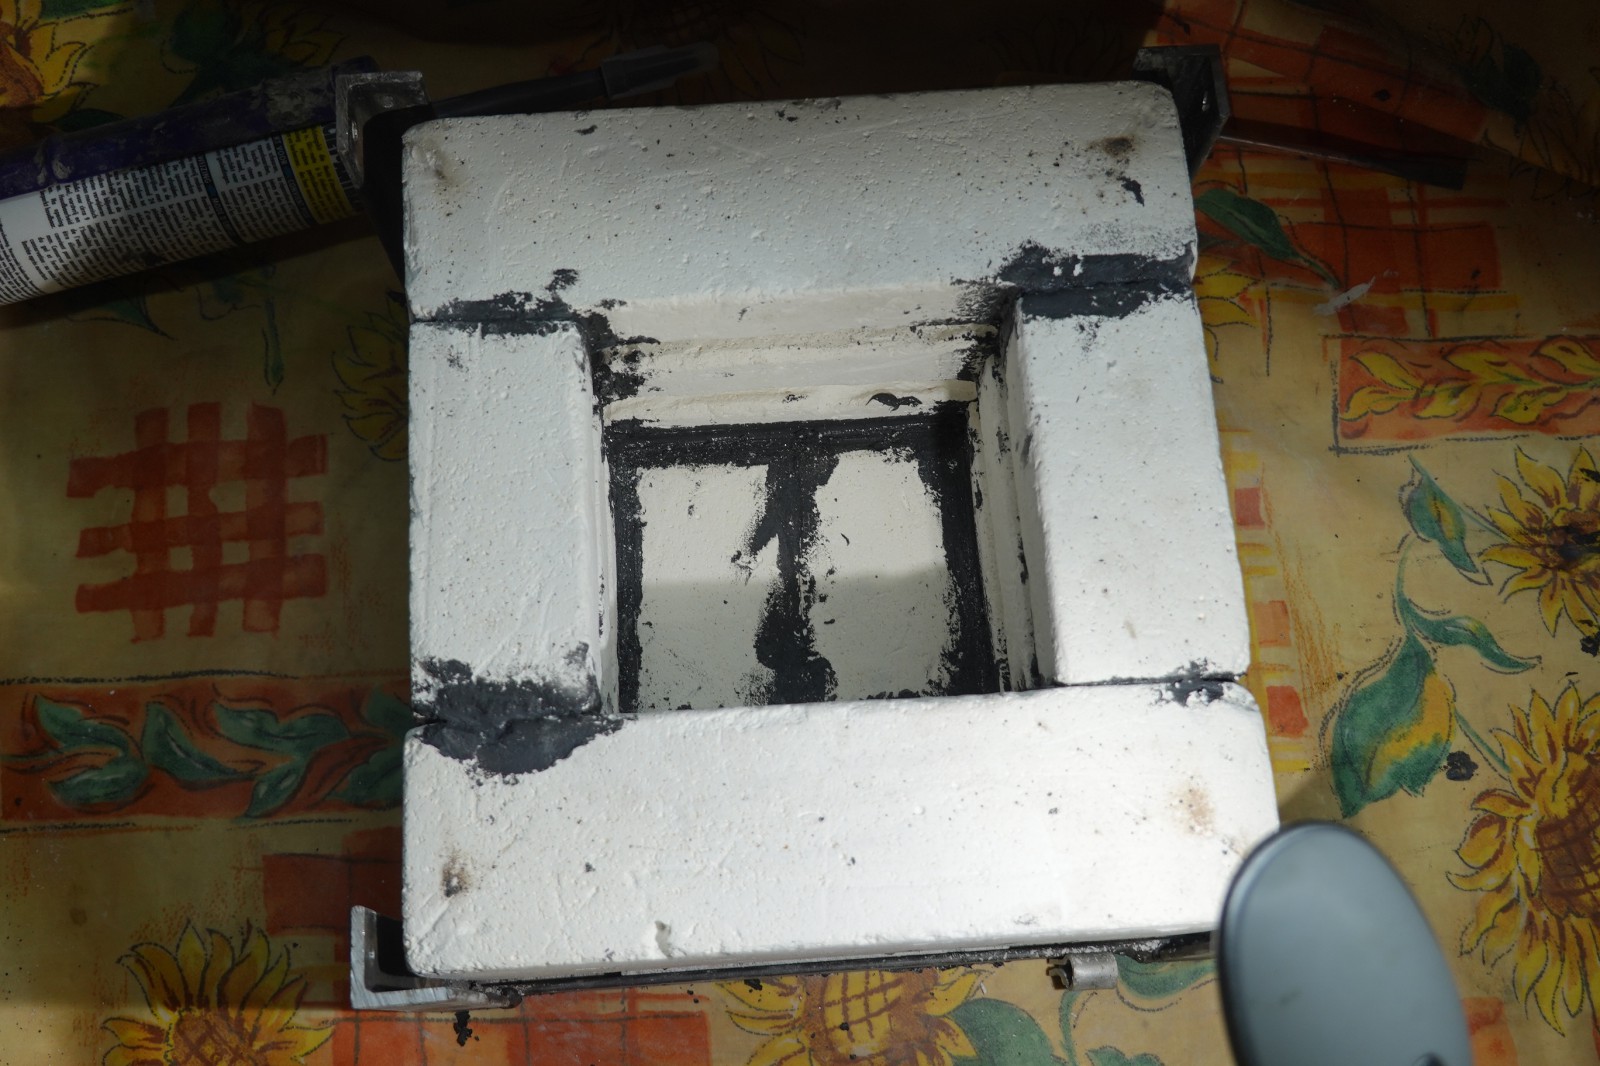
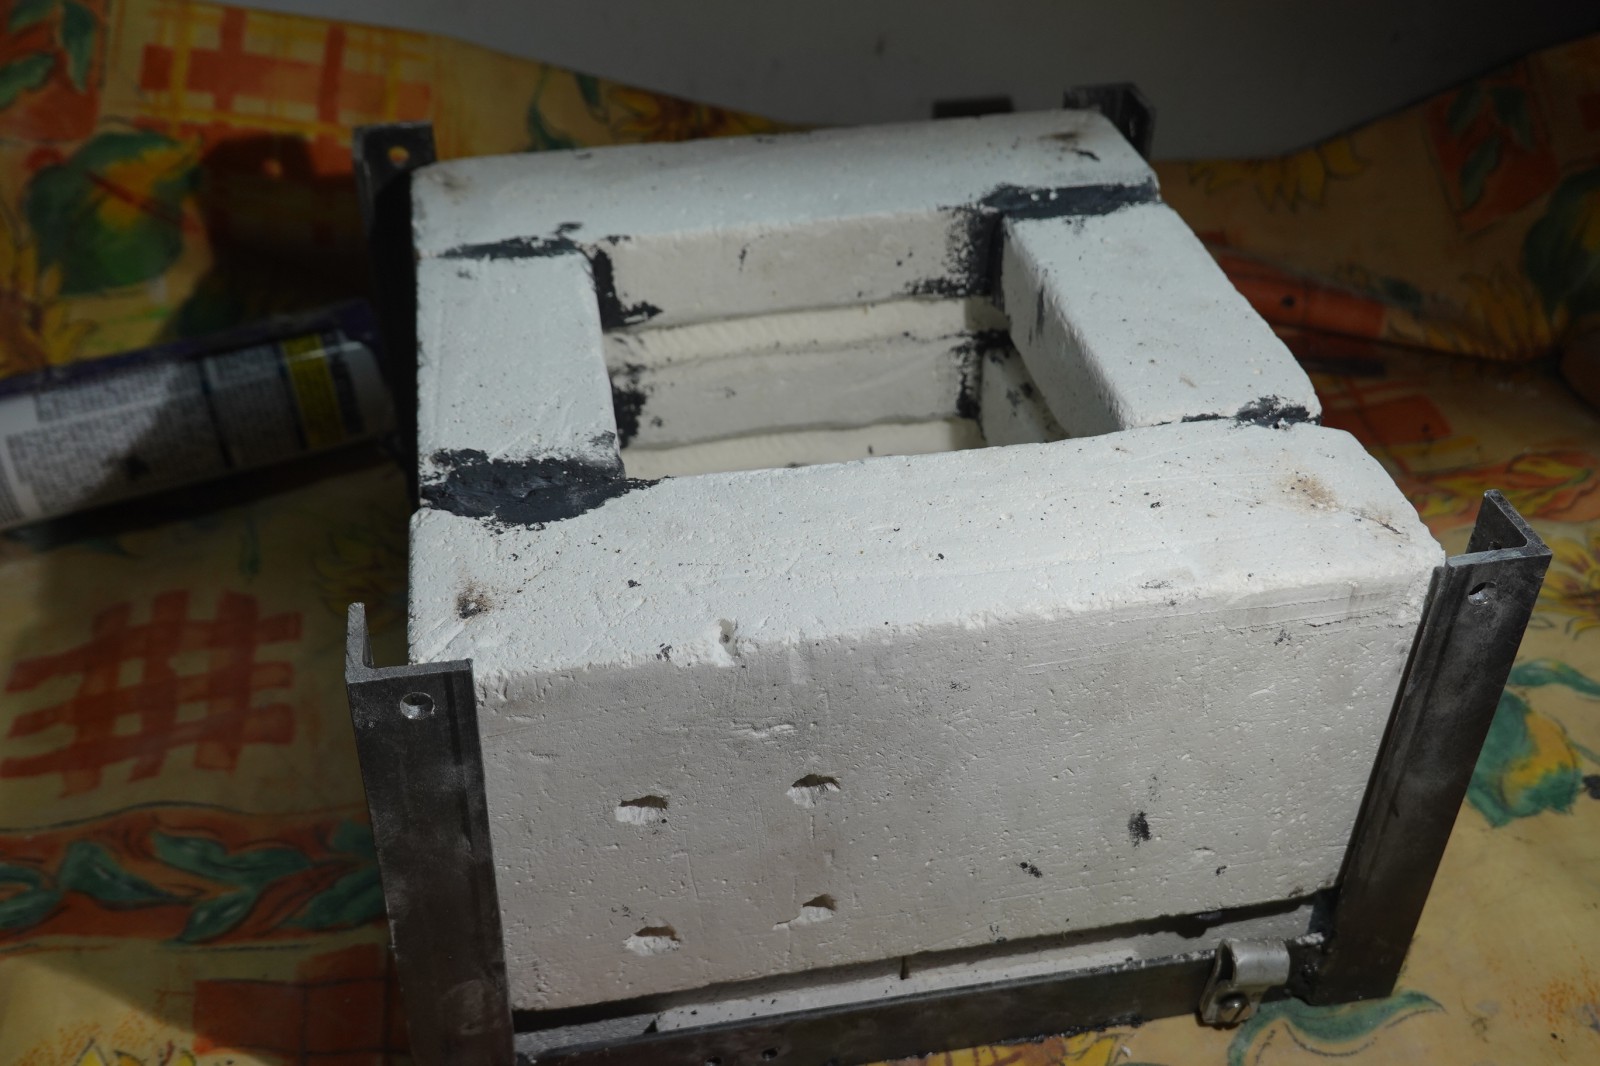
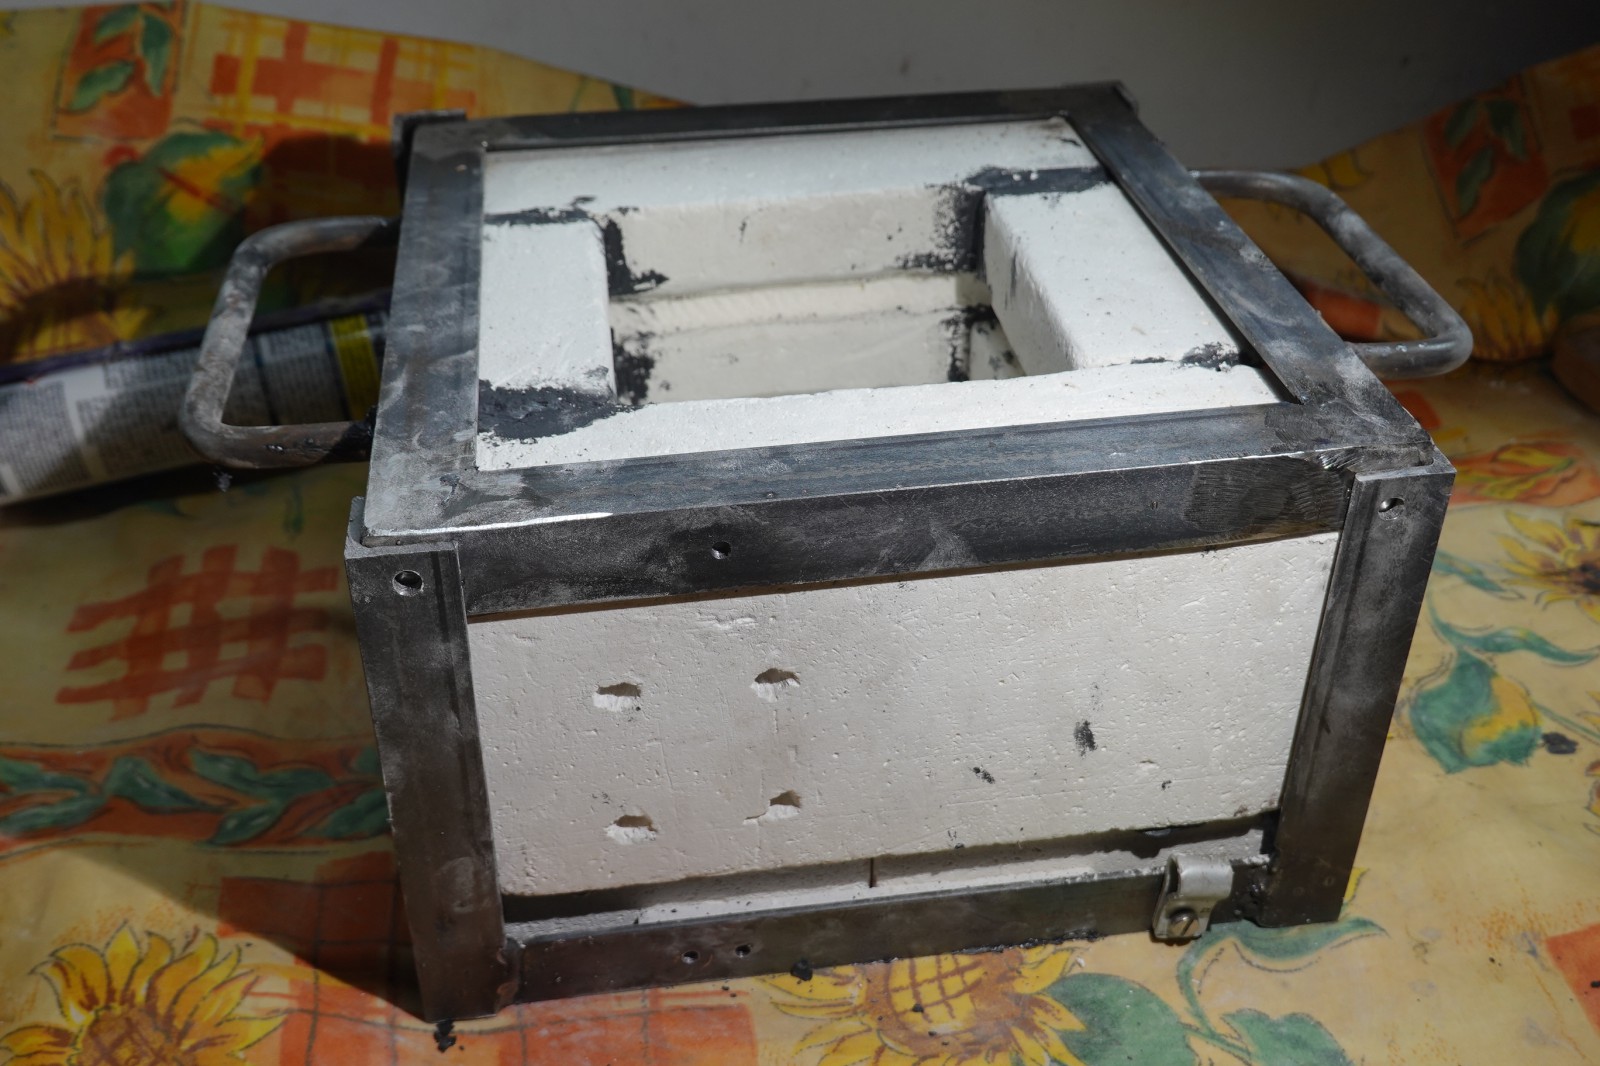
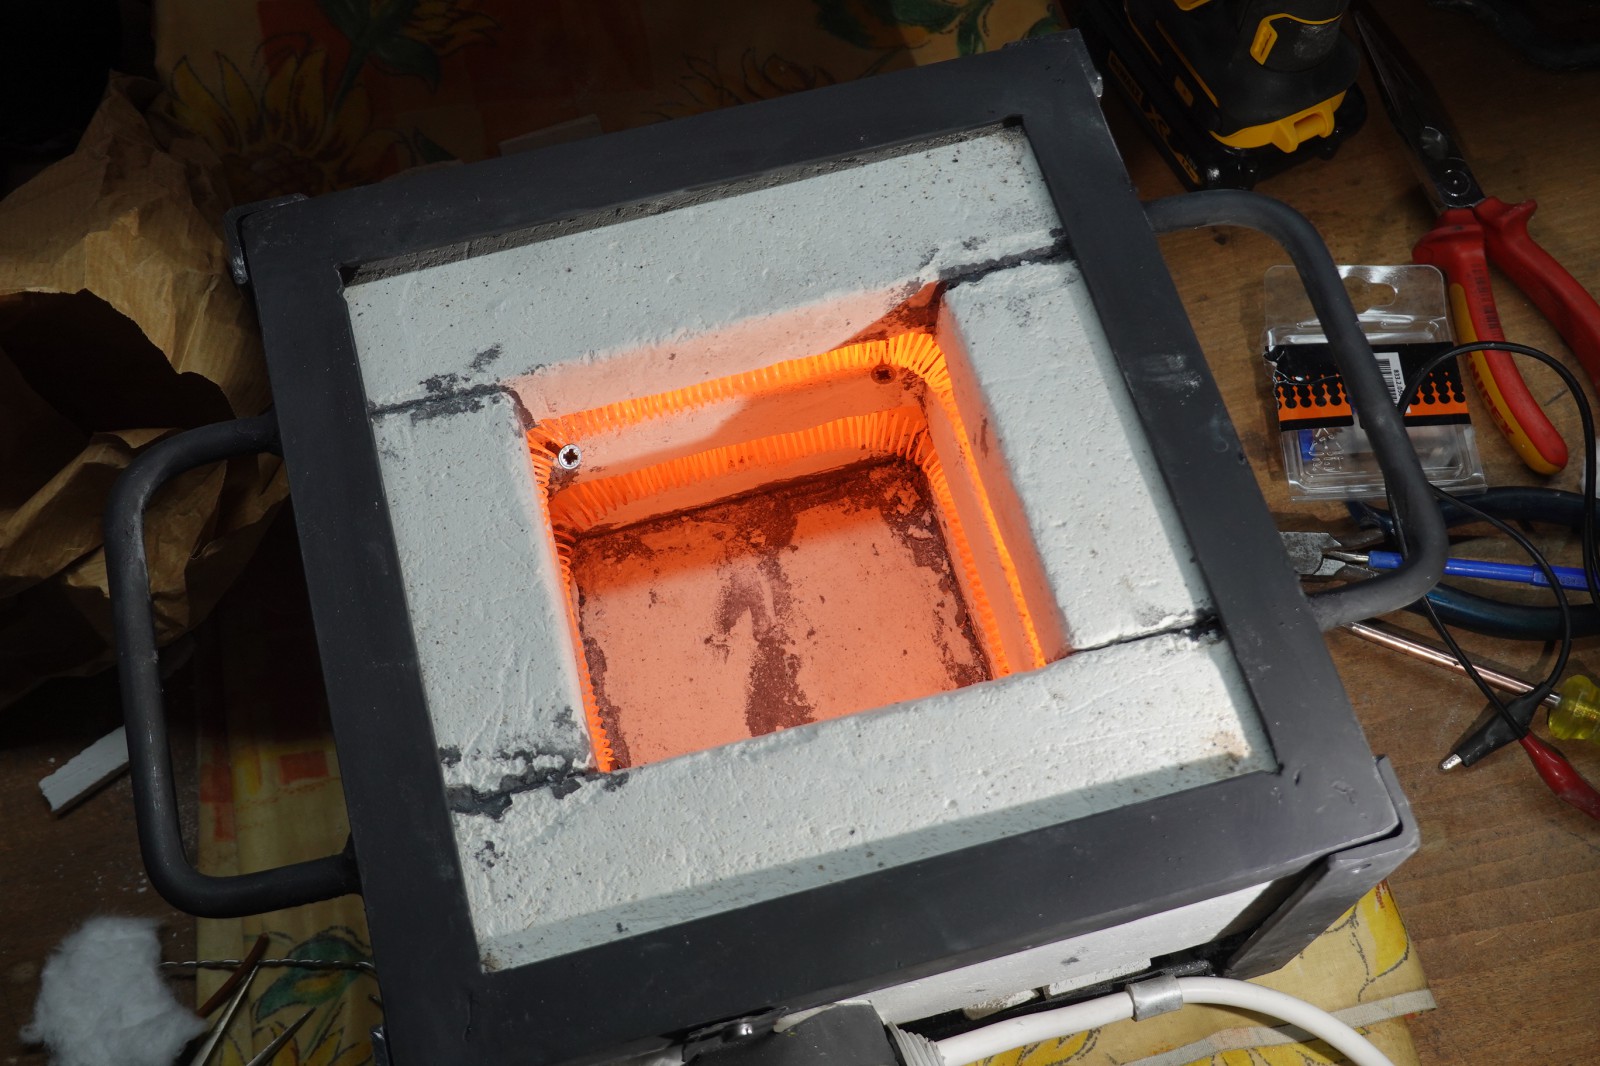
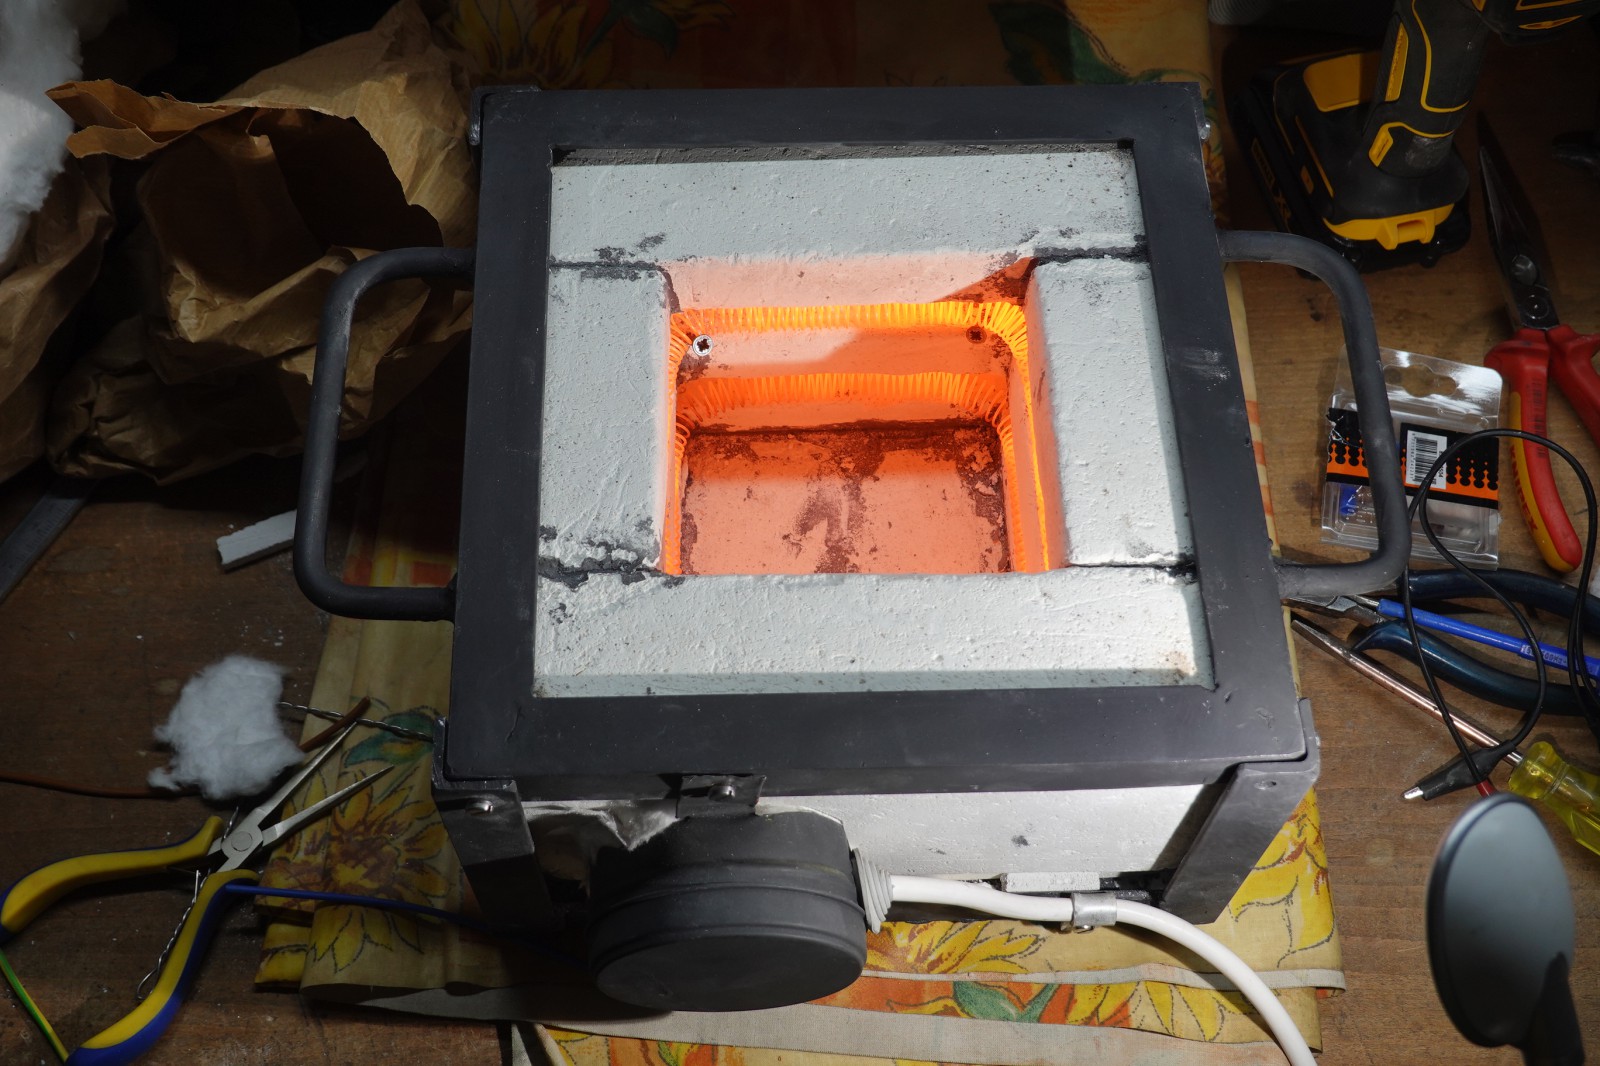
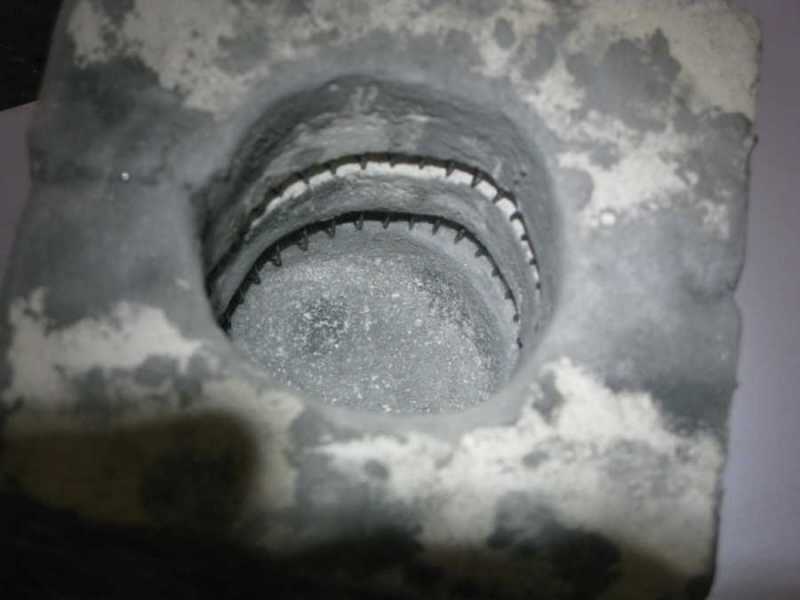
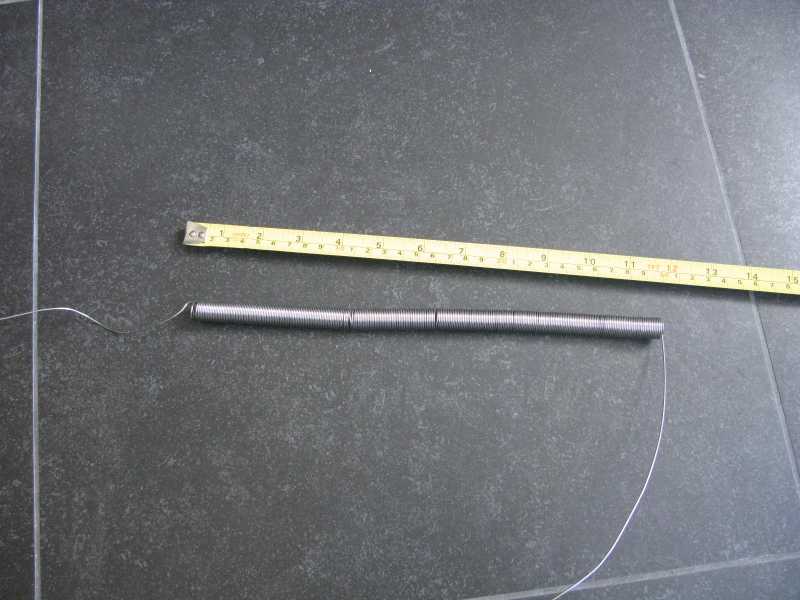
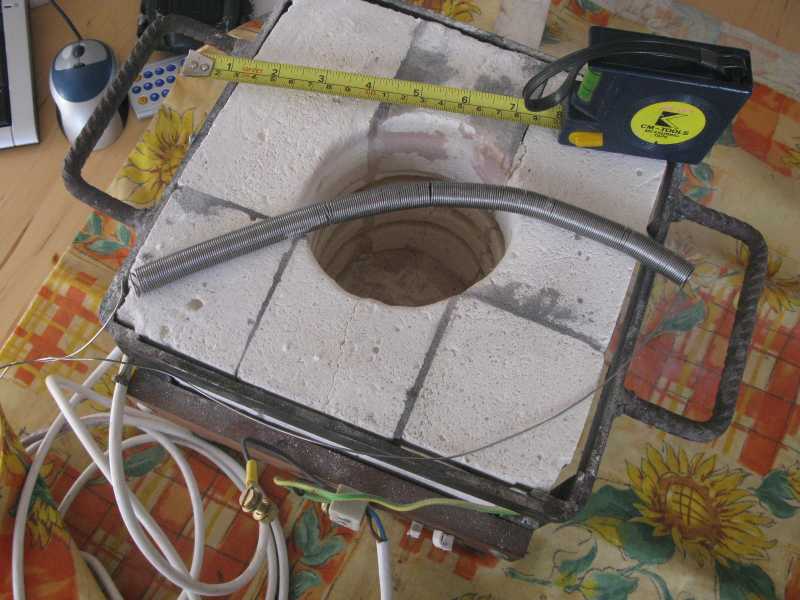
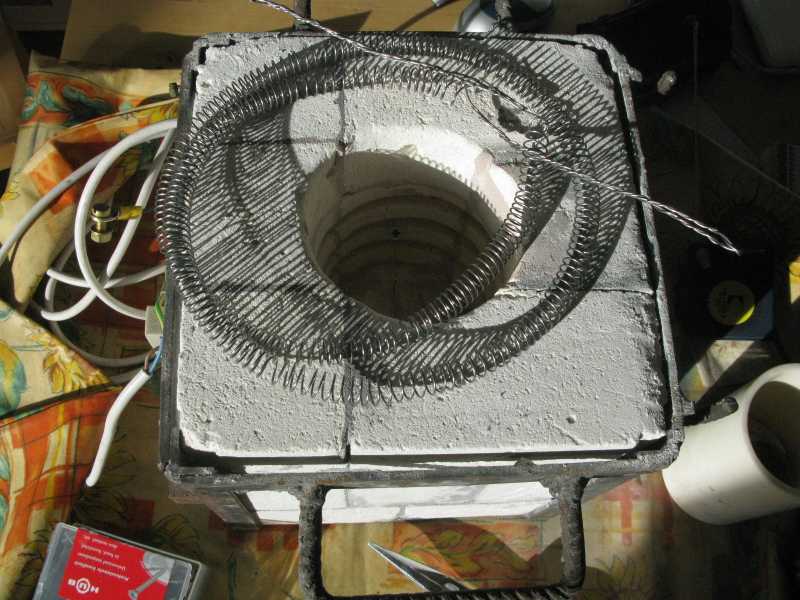
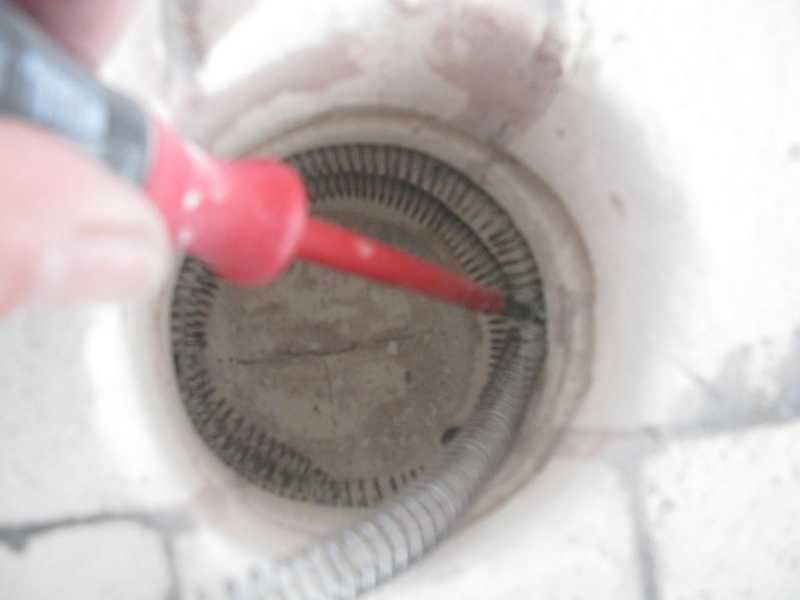
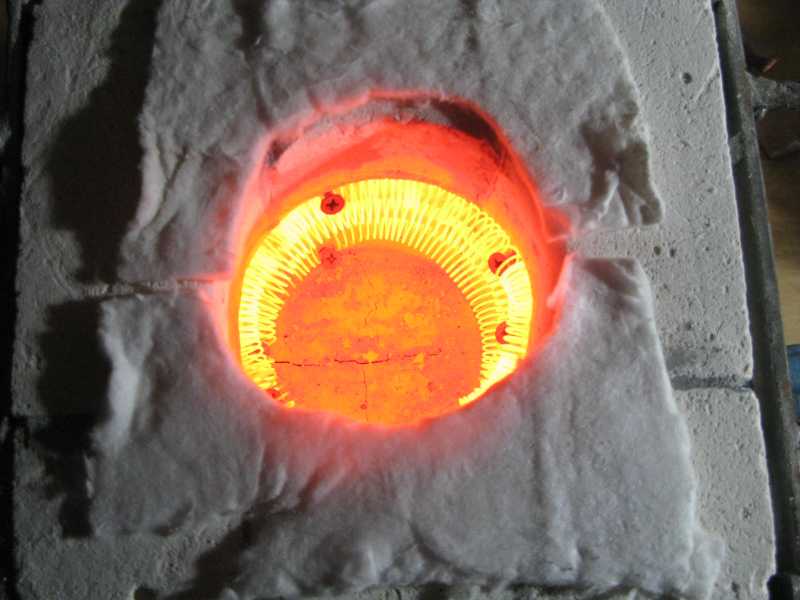
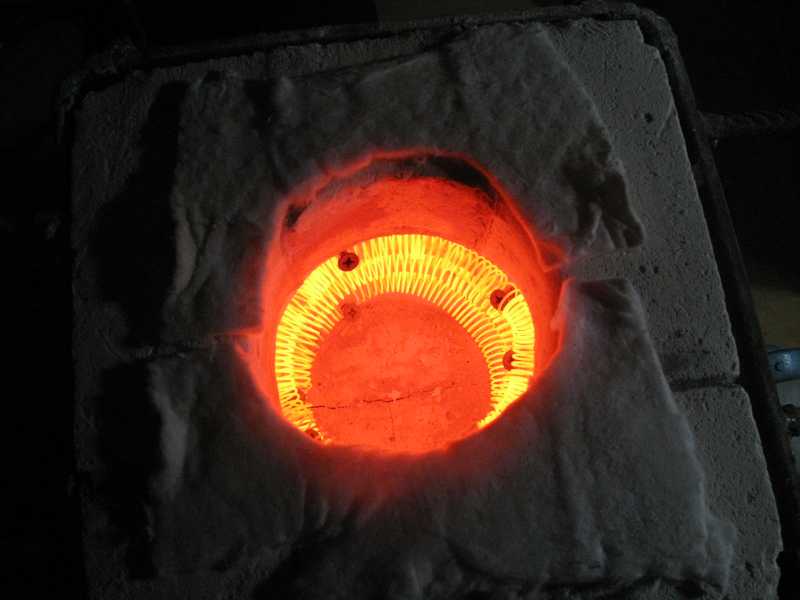
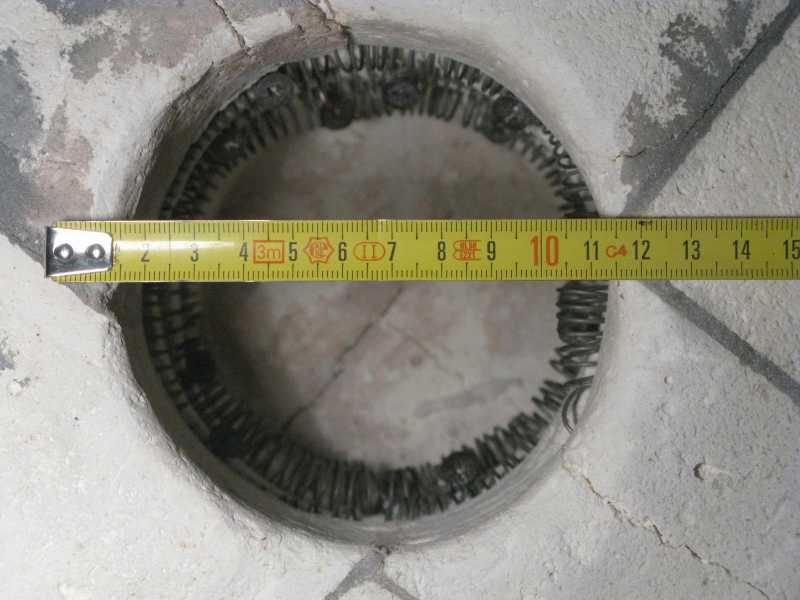
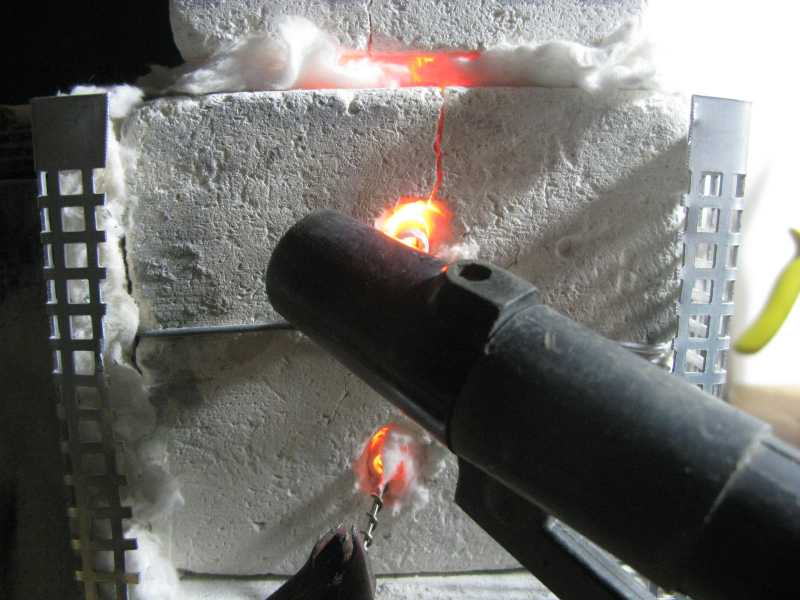
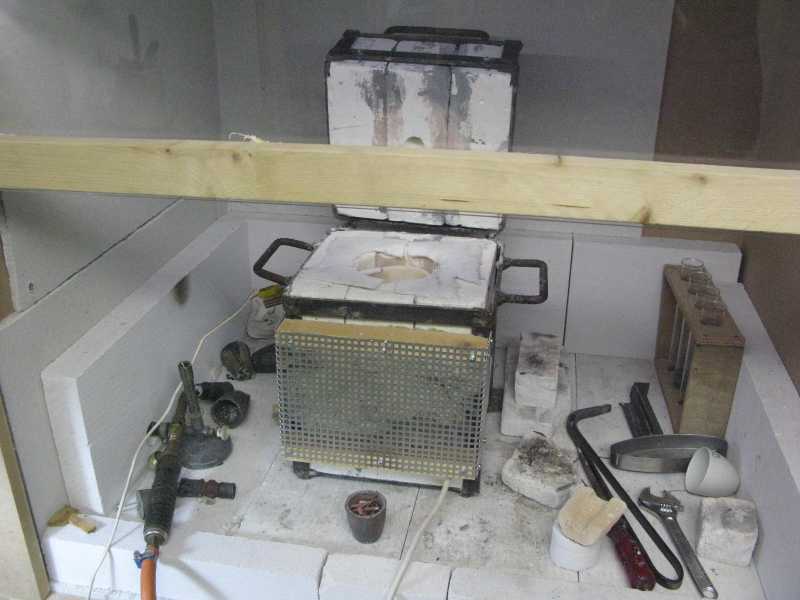
New furnace December 2020Now I decided to make a new one, more compact but the same power (max 2400W). I got six K23 bricks from Keramikos, a pottery and ceramics baking supply store, these are rated for 1250°C, enough for such a furnace. I wound 12m of 1mm diameter Kanthal A1 wire in two coils in series in a square 11.5x11.5x11.5cm cm (4 1/2" x 4 1/2" x 4 1/2") furnace chamber. The lid is made of two other bricks held together by a steel frame. The bottom of the lid has a Kaowool seal to prevent heat eascaping from the furnace. The temperature can be controlled by the same controller as the older furnace.
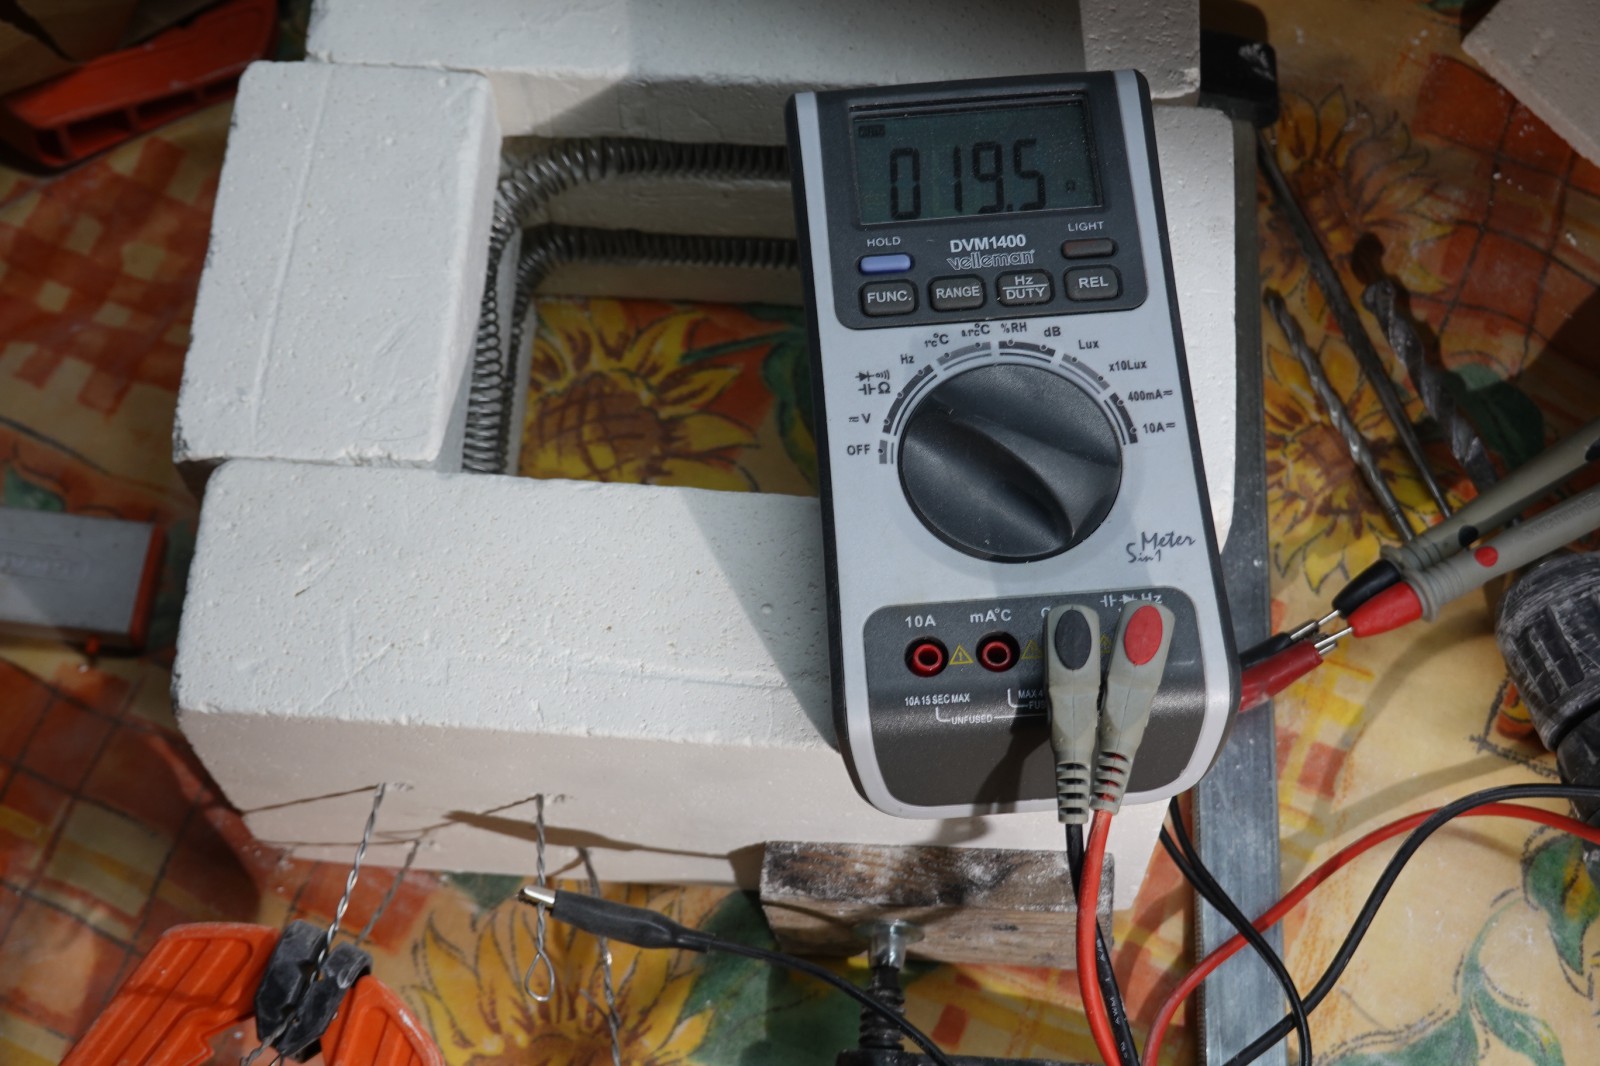
Power When connecting directly to the 115 or 230 mains, do not
touch any bare wires unless the power is disconnected. I used a welder which provides 40 Volts which
is safe and powers a 500 Watts Kanthal coil with a total length of 1.5 m. With the form below one can
calculate the length of a wire for the correct furnace temperature, compared with carbon rod or platinum
wire. The Room temperature is the temperature inside the furnace, not of the element, the latter always be
higher. When connecting directly to the 115 or 230 mains, do not
touch any bare wires unless the power is disconnected. I used a welder which provides 40 Volts which
is safe and powers a 500 Watts Kanthal coil with a total length of 1.5 m. With the form below one can
calculate the length of a wire for the correct furnace temperature, compared with carbon rod or platinum
wire. The Room temperature is the temperature inside the furnace, not of the element, the latter always be
higher.
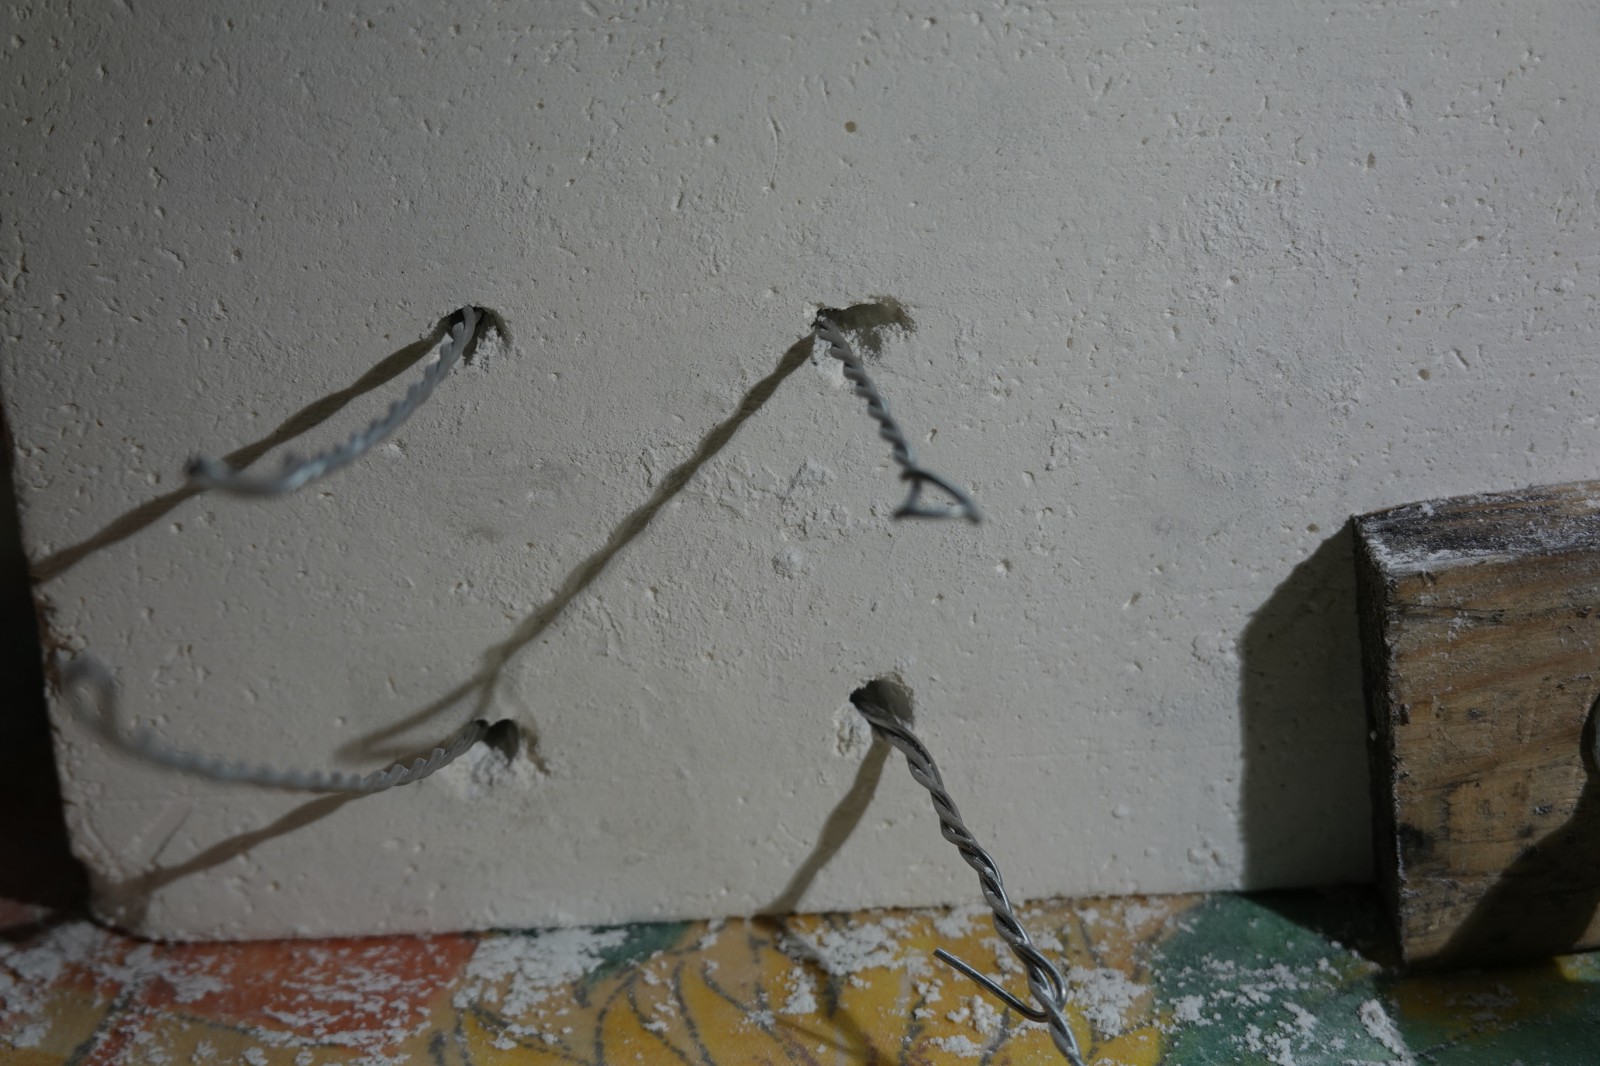
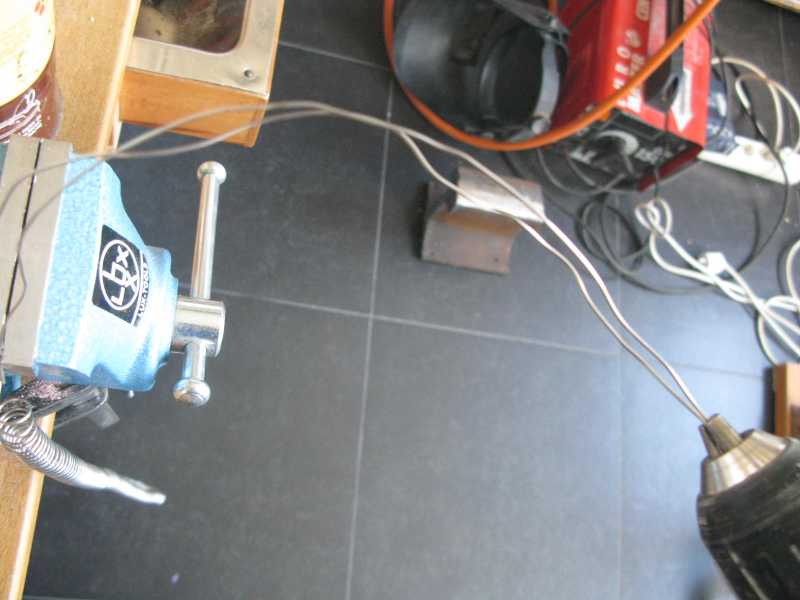
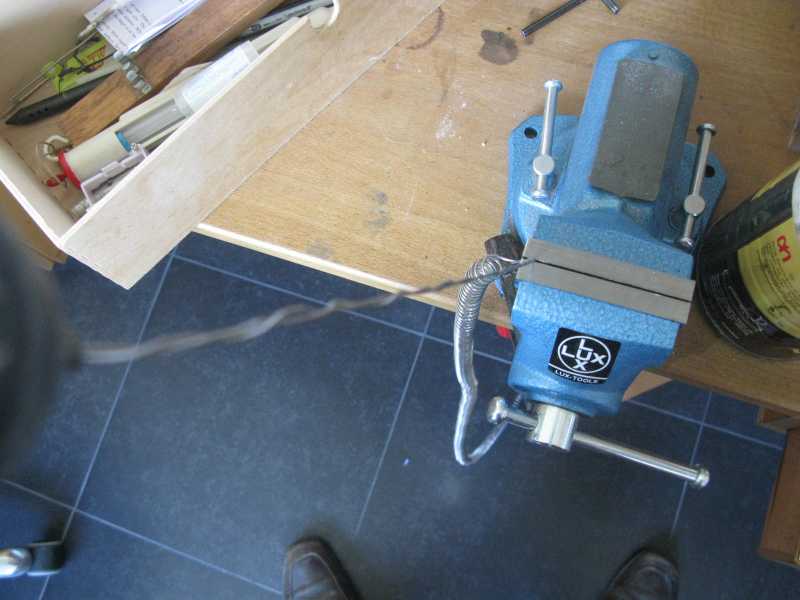
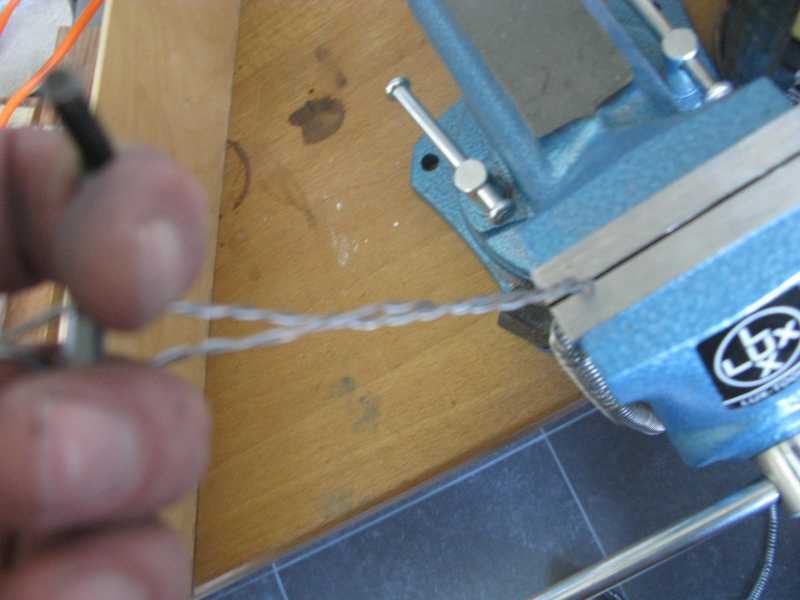
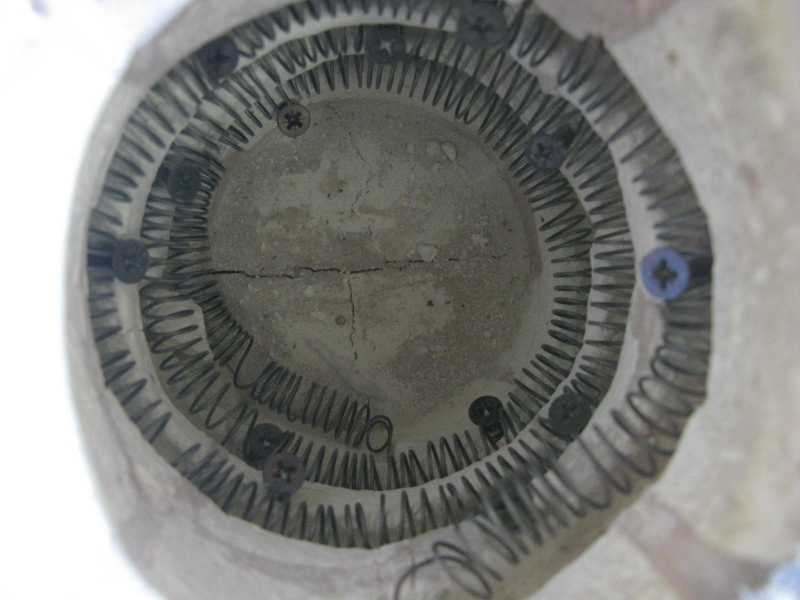
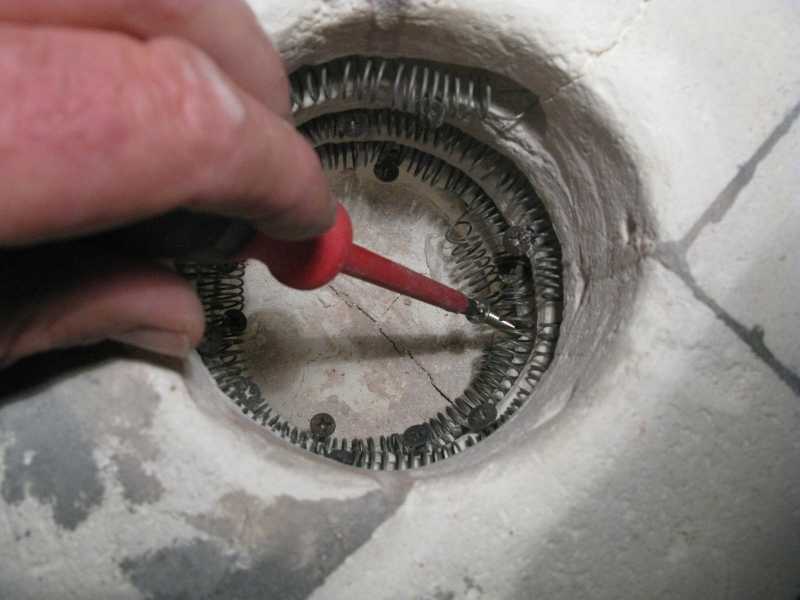
A few notes on heating and setting up. Set up and fix the coils before applying power to it for the
first time. After the first few heatings, the wire gets brittle and tends to break easily. Attaching it to
power wires, use iron wire which is thicker than the Kanthal wire and is not galvanized. When is is
galvanized, heat the iron wire to bright red to remove the zinc. Do not use copper, aluminum or silver as
this wire will melt. Wrap the Kanthal wire a few times tightly around the iron wire about 2 cm from the end
and bend the iron wire tightly 'back' over the Kanthal wrap. Note: these connections should be very
tight otherwise it will overheat at these points and burn out. Repair is difficult as wire, once heated,
is brittle. I wasted lots of Kanthal wire this way.
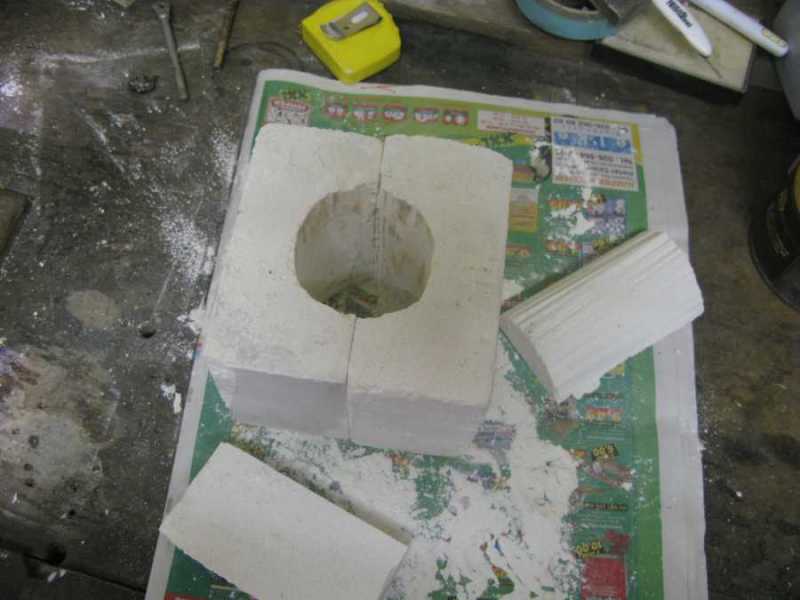
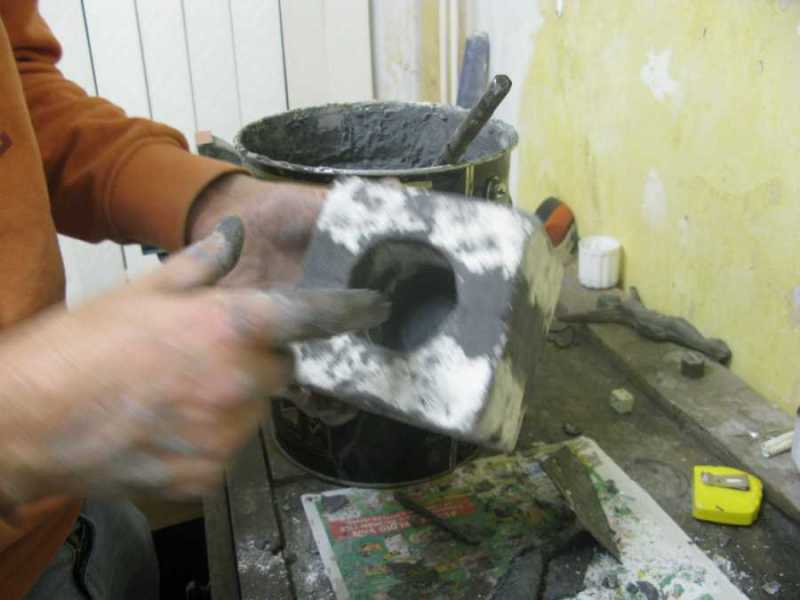
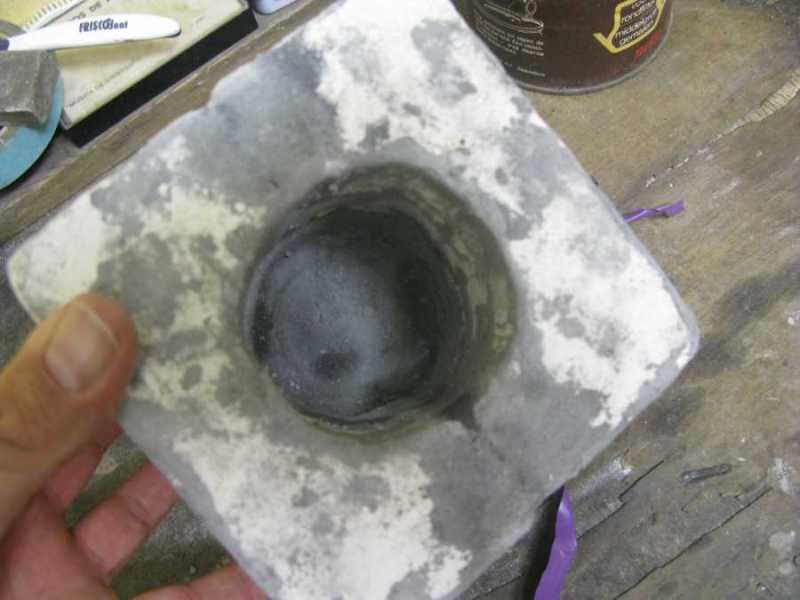
My first furnace projectIn 2003 I built an electric furnace with the same refractory as I used with a gas furnace: the cheap and widely available YTONG building blocks. These are made of mainly dead-burnt gypsum CaSO4 with air spacing for insulation, intended for inner walls in buildings and not for furnace use at all. I discovered their good refractory capabilities by accident: they are very good insulators (this is deliberate: in the cold climate of Northern Europe where they are widely used they should keep the heat inside the houses) and resistant to 1300oC and shortly even to 1450oC. Above that temperature it changes into a pudding which collapses easily. When cooling down then, it gets hard and brittle and has a bluish color. Above 1300oC it starts to decompose which can easily be smelled by the SO2 odor. The 'actual' refractories which are easy to obtain like chamotte or castables are heat soaking: in small furnaces it costs about twice the time to heat a furnace to the same temperature with the same power than using YTONG. Moreover, a furnace lid of YTONG of at least 3 cm thick which is over 1000oC on the furnace side can easily be grabbed by bare hands on the other side. The real magnesia based refractories with good insulation capabilities are expensive and/or hard to obtain. Of course, the YTONG has it cons as it is not designed for furnace applications: it cracks easily, but usually only once, particularly when the moisture is not removed before by heating it slowly. Close to the heat source (a burner or electric element) it cracks and wrinkles, but not too bad. It can be carved easily, with an old big screwdriver the most can be done. Masonry drills drill very easily in it. So a cilindrial hole can be carved easily in a block. As the blocks are cheap ($2 for a 60x20x7 cm) they can be replaced easily and at the furnace design one should take into account that the refractory can be replaced easily without redoing too much work. E.g. wrapping iron wire tightly around a piece keeps the furnace body or lid together and retains the excellent insulation capacity even when it is cracked. The first heating (electric or gas) should be very slow : all moisture should be removed.
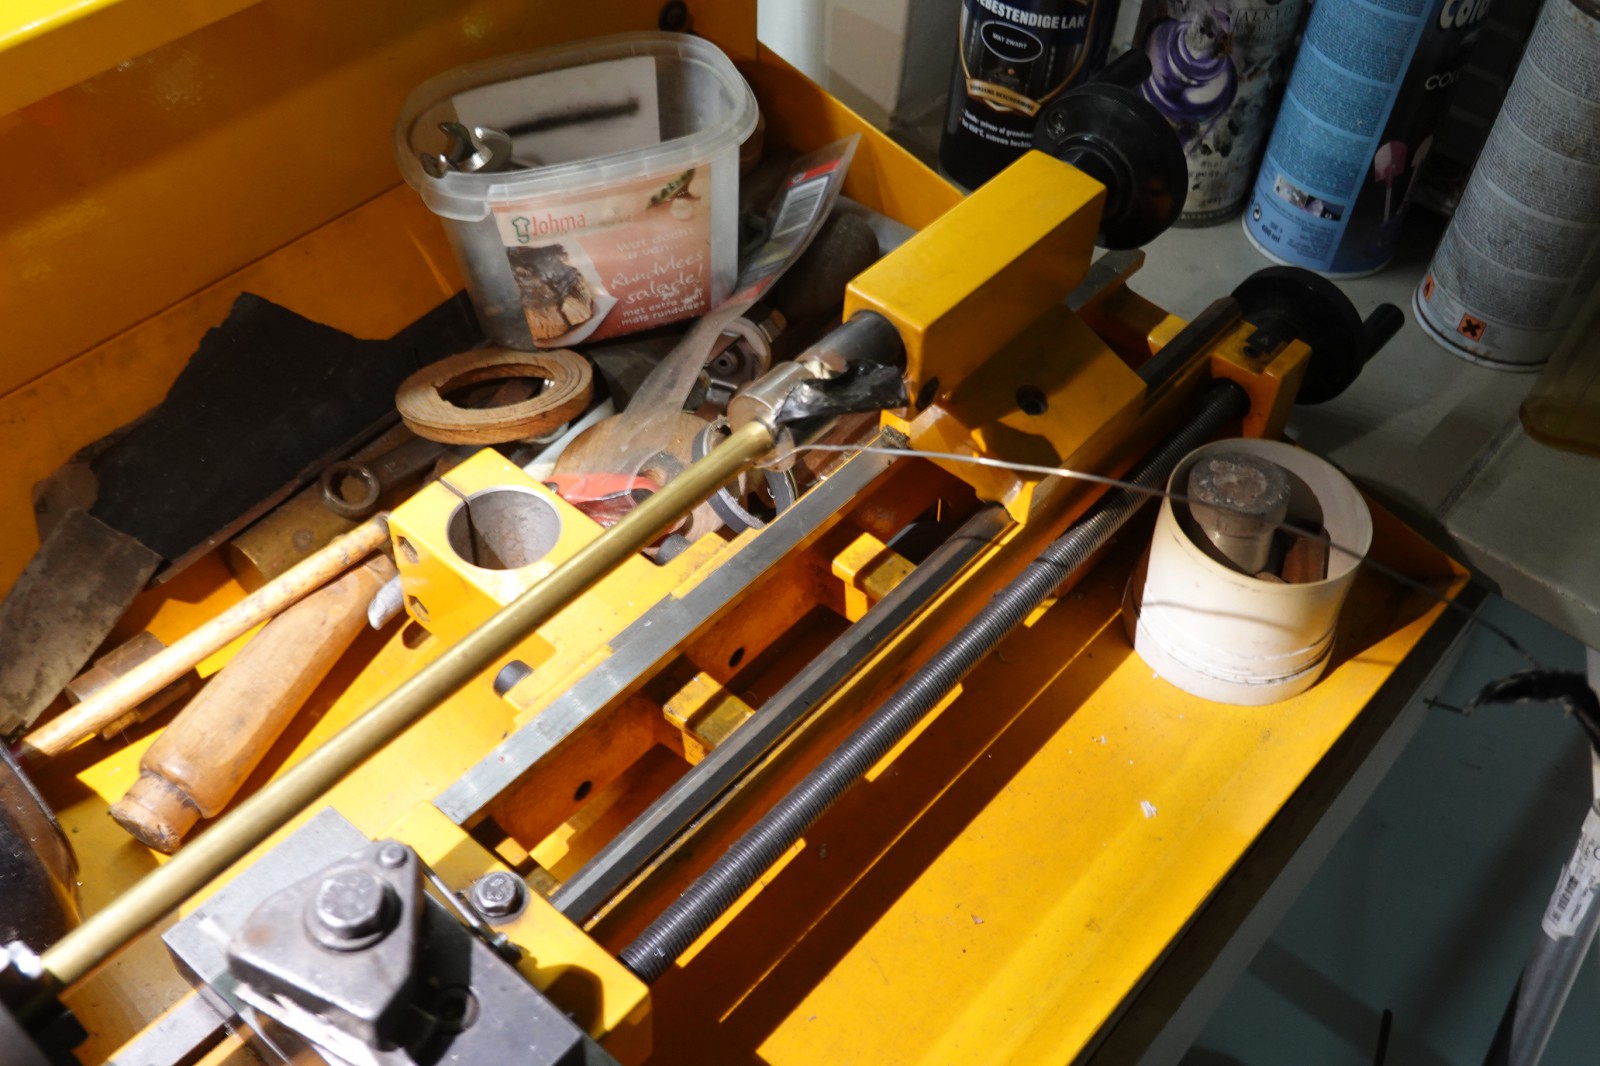
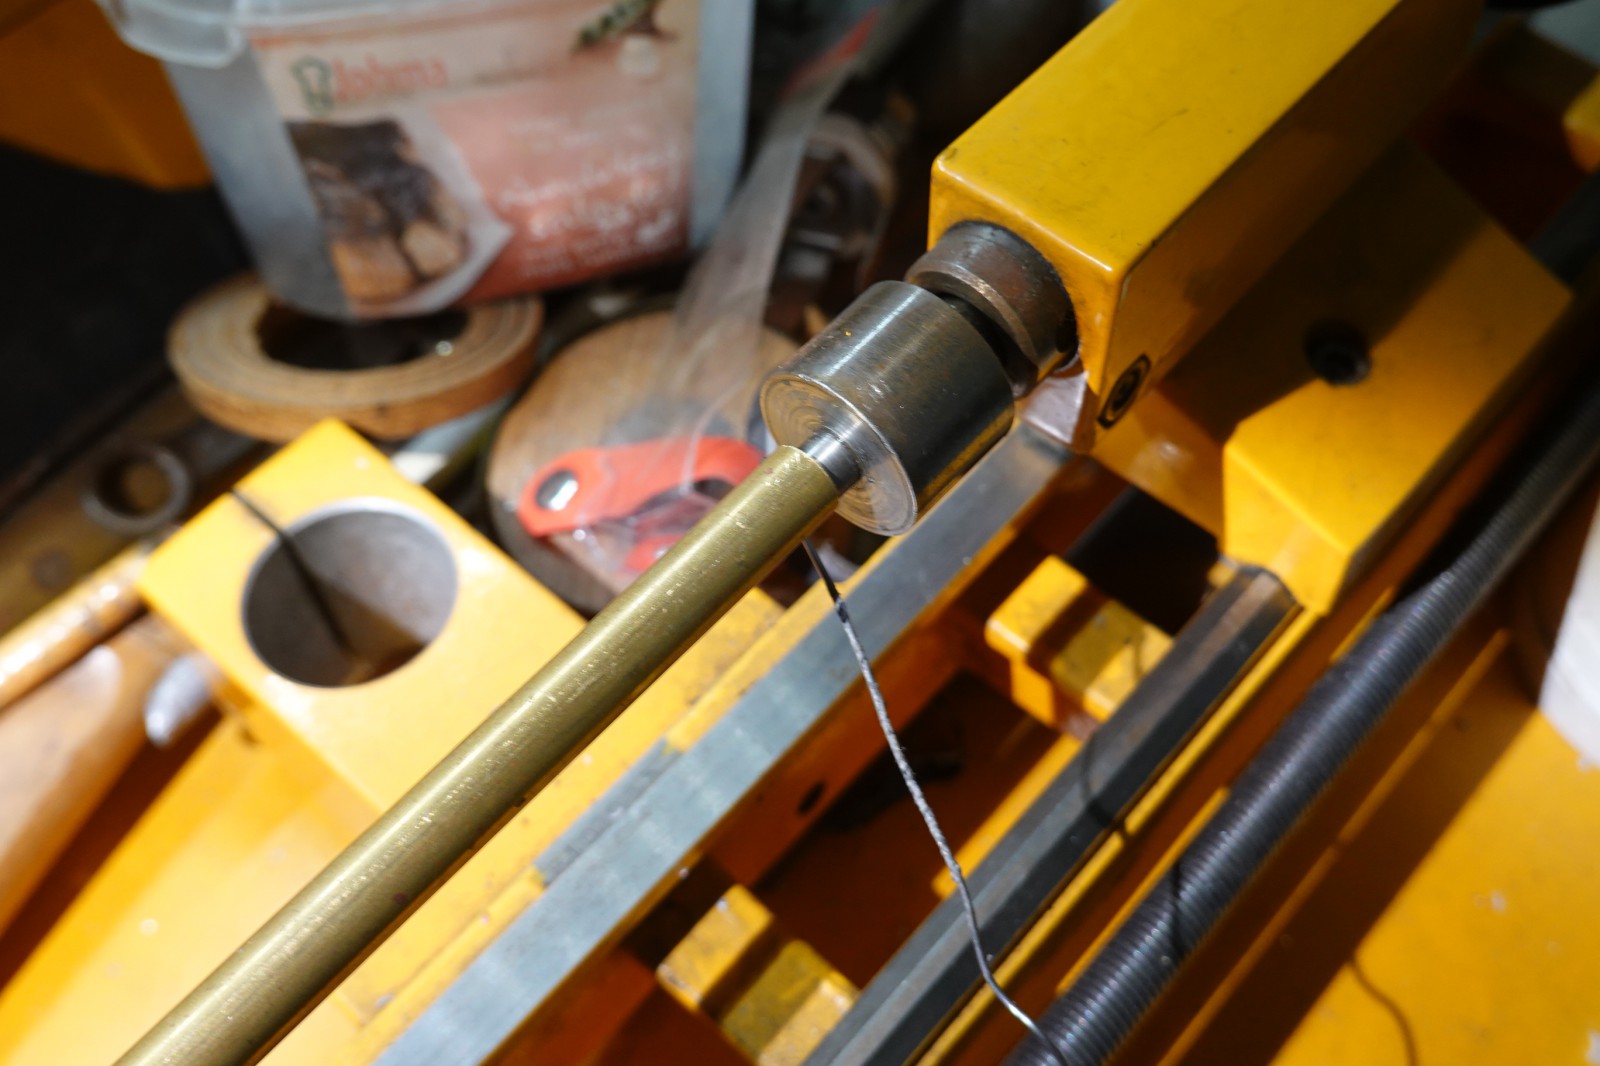
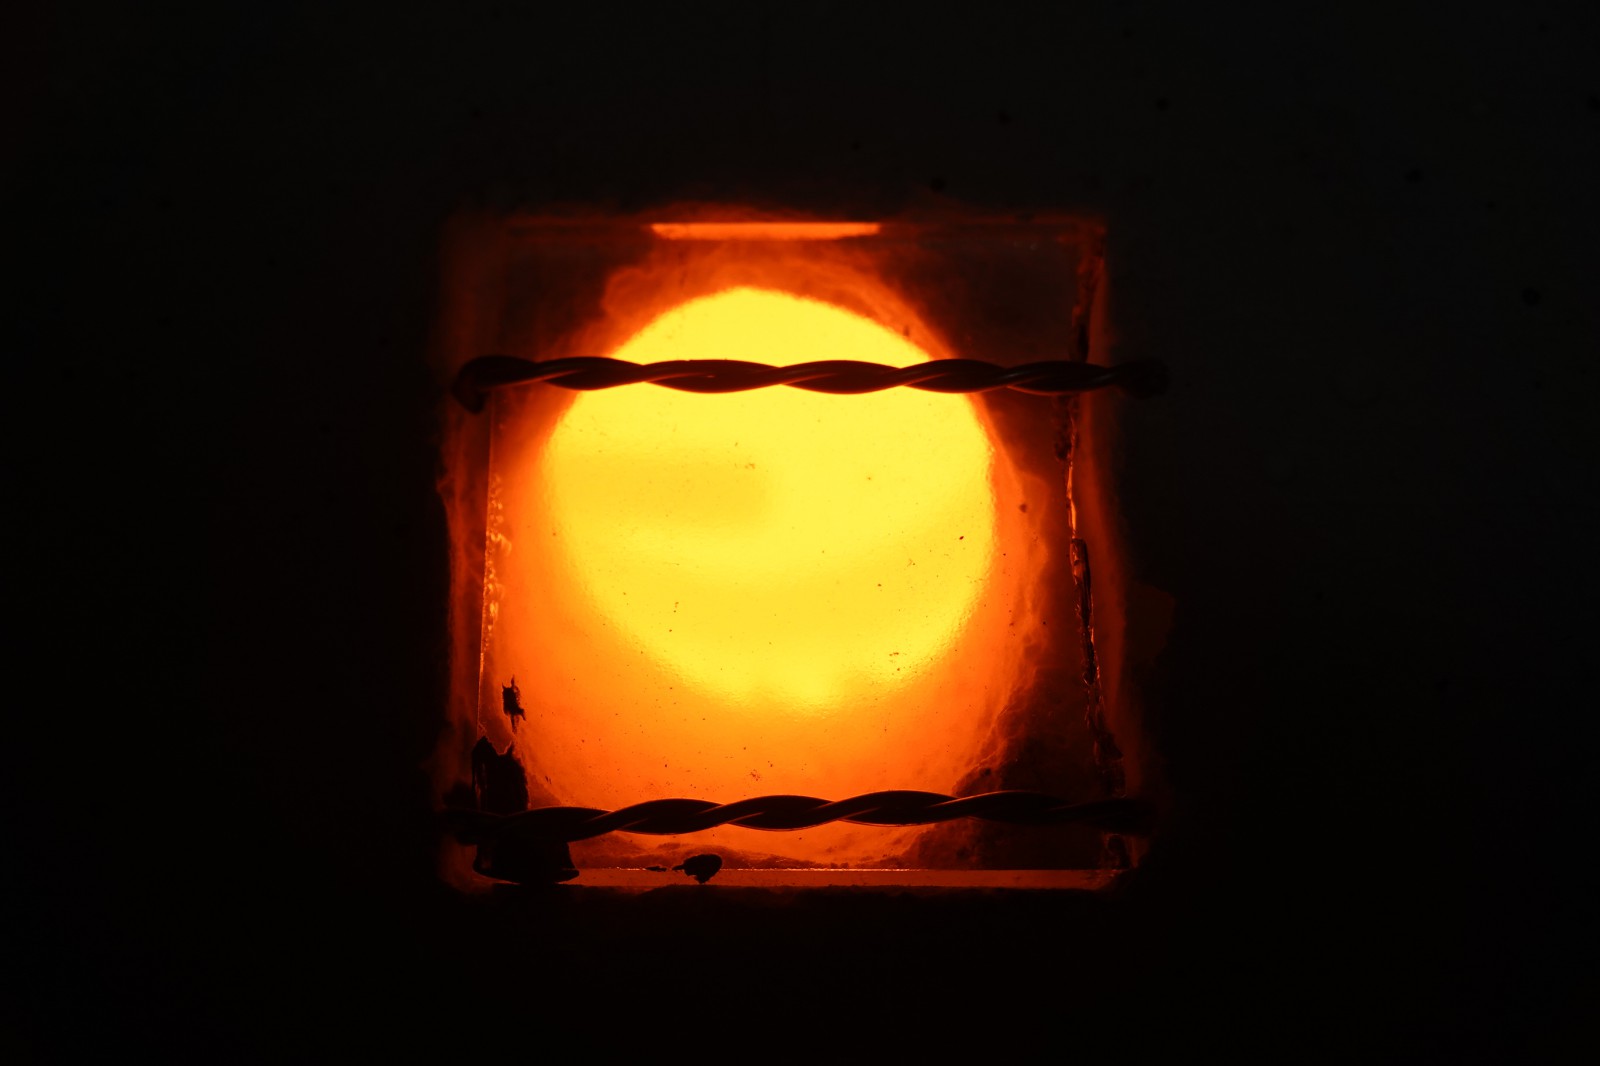
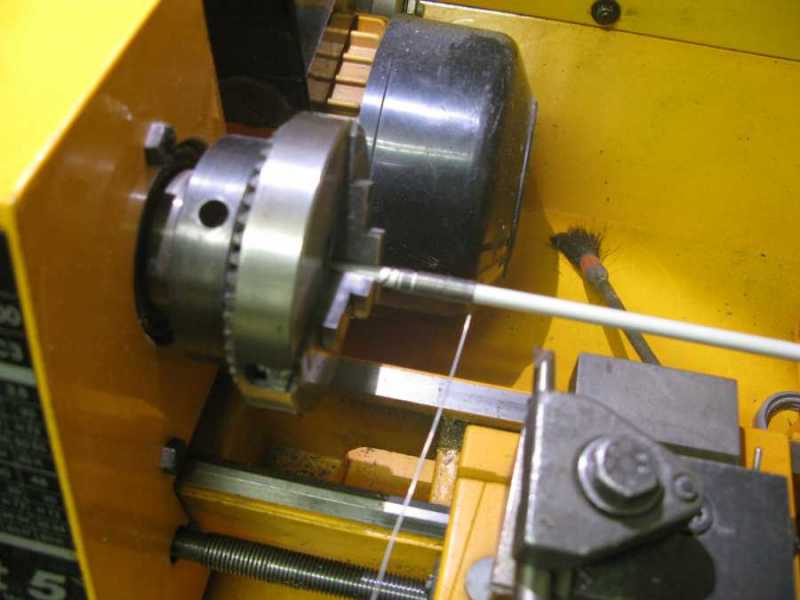
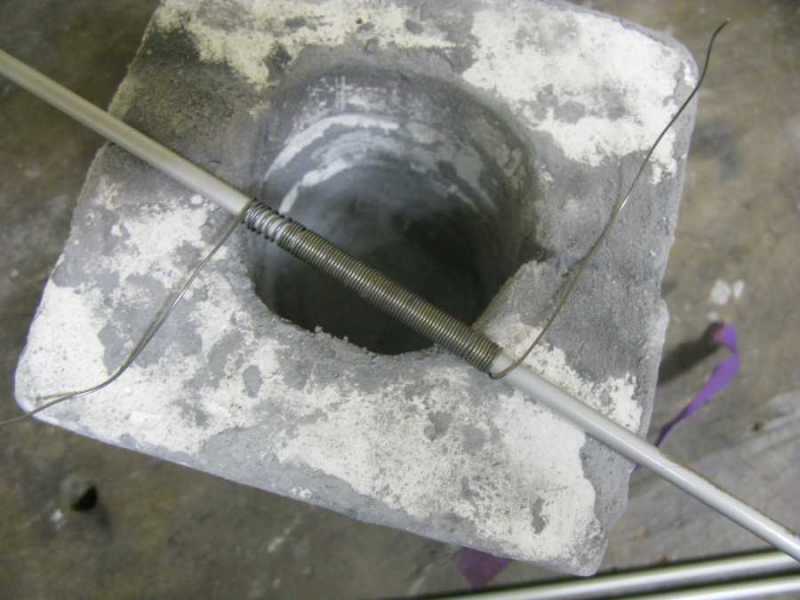
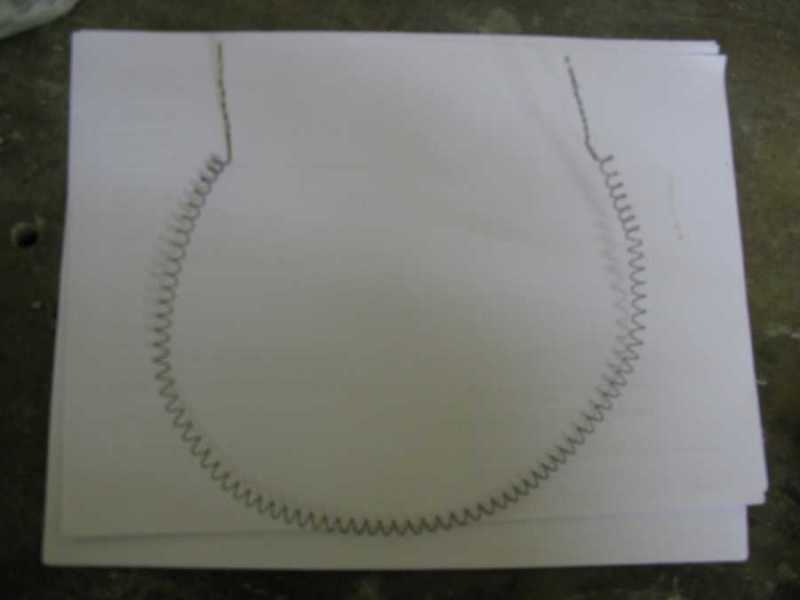
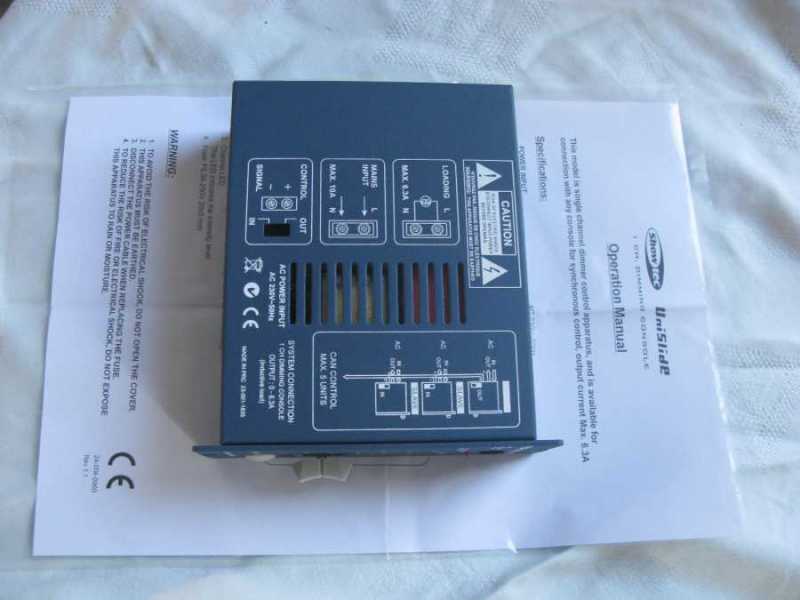
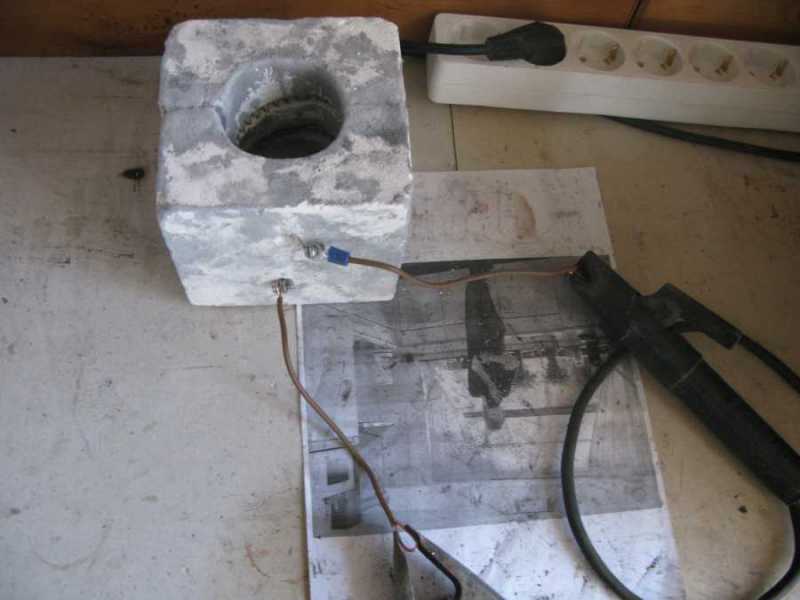
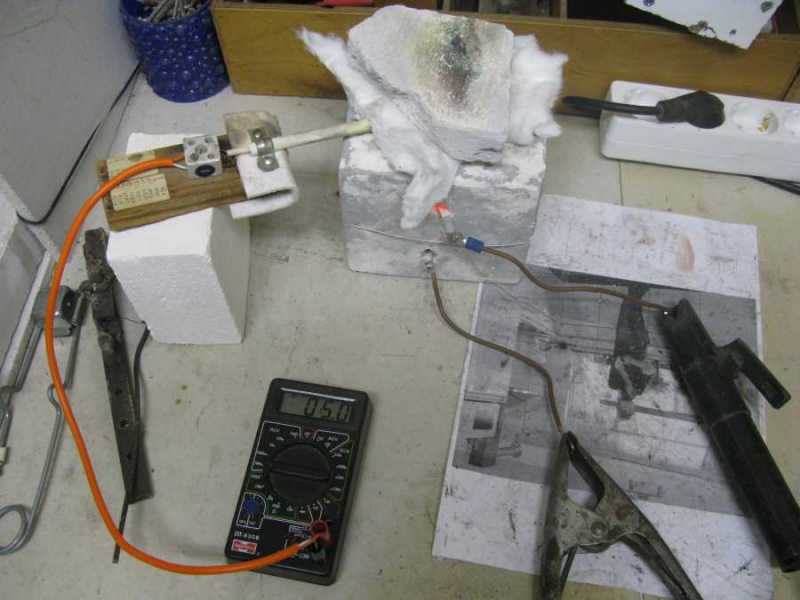
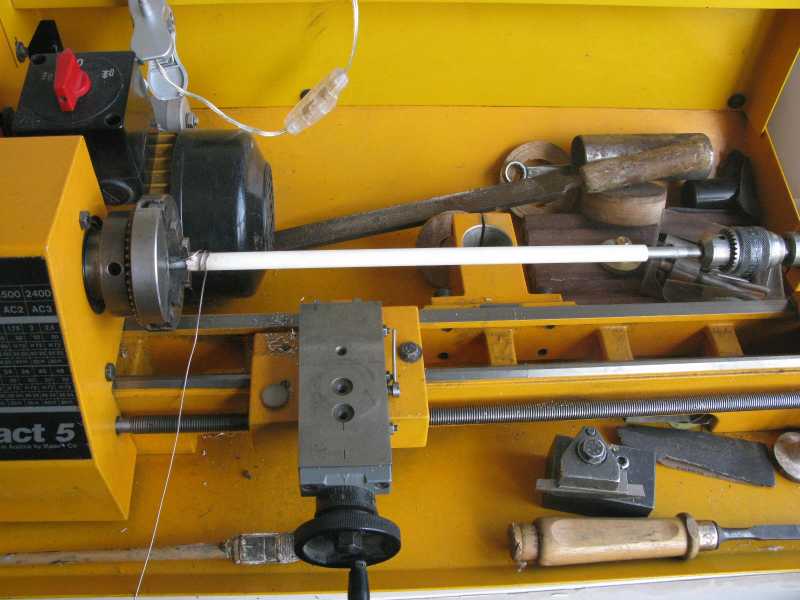
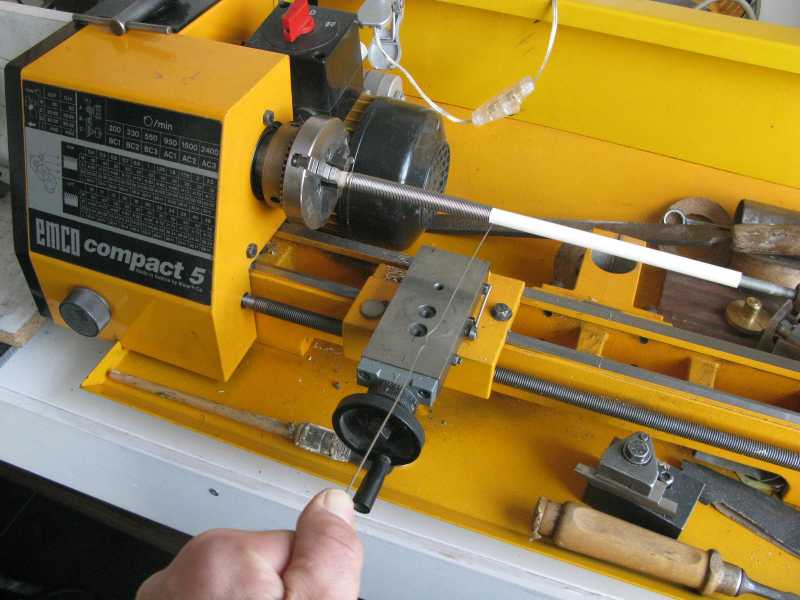
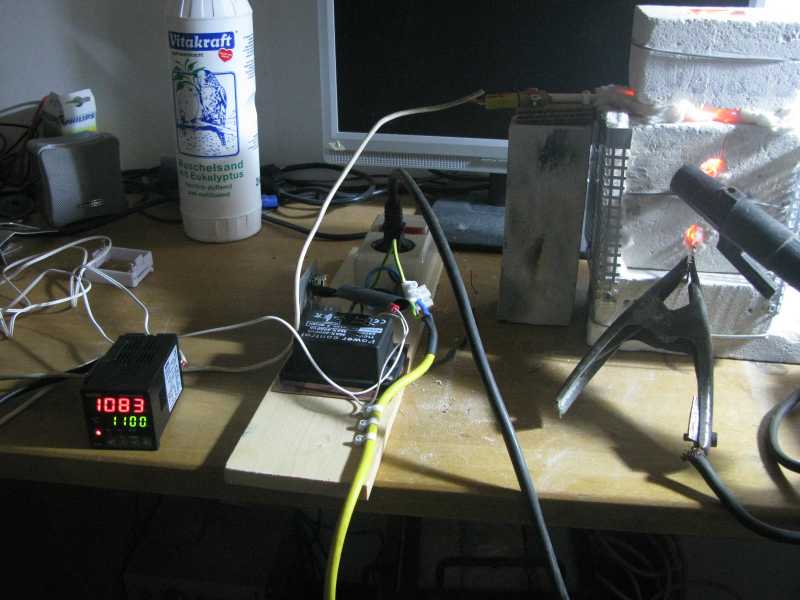
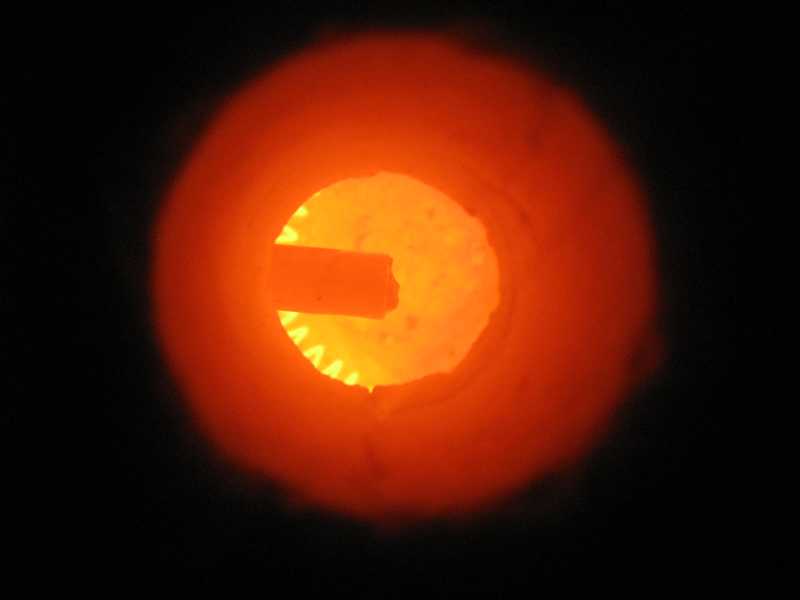
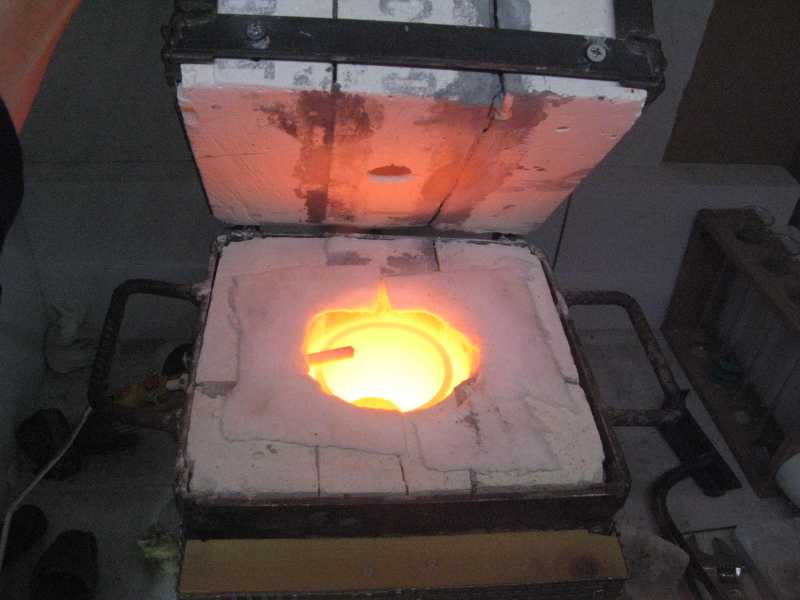
Newer versionIn November 2008 I tried to make a very small model powered by a 40 Volts welder with 1.5 m of 0.7mm Kanthal wire and built it from 2 bricks of alumina bricks glued with Blakite. I made the coils by winding around a knitting pin in the lathe which allows a very tight wound coil.For controlling the current through the Kanthal wire (to prevent burnout) I used a disco light dimmer which is also suitable for inductive loads such as a welding transformer. This device (photo 10) allows loads up to 6 Amperes. So I connected the Kanthal coil in the furnace to the secondary of the welder (40 Volts). This 'short circuit' will not damage or overheat the welder as this is 'only' 7-10 amps which is much below the 110 amps rating.But when the current becomes too high, the Kanthal wire may burn out, when it gets above 1400°C. So hence the dimmer for the welder. Starting from a cold furnace can be done with full power but when the furnace is hot, one has to pay attention that the Kantal does not get too hot: when becoming light-yellow, then it has te be dimmed. I did a test with melting copper (1083°C) by putting a cold crucible with about 50g of red copper into a cold furnace. The melt took 45 minutes but wit a very low energy consumption. A propane burner takes only 10-15 min for melting up till 200g copper. On the clip is visible that the thermocouple (a type S sheathed in an alundum tube) reads out 9.8 mV just before the pour. This means 1020°C, but when looking into the peephole on top of the furnaceone sees the sheathed thermocouple head darker than the background (the crucible content which is copper).
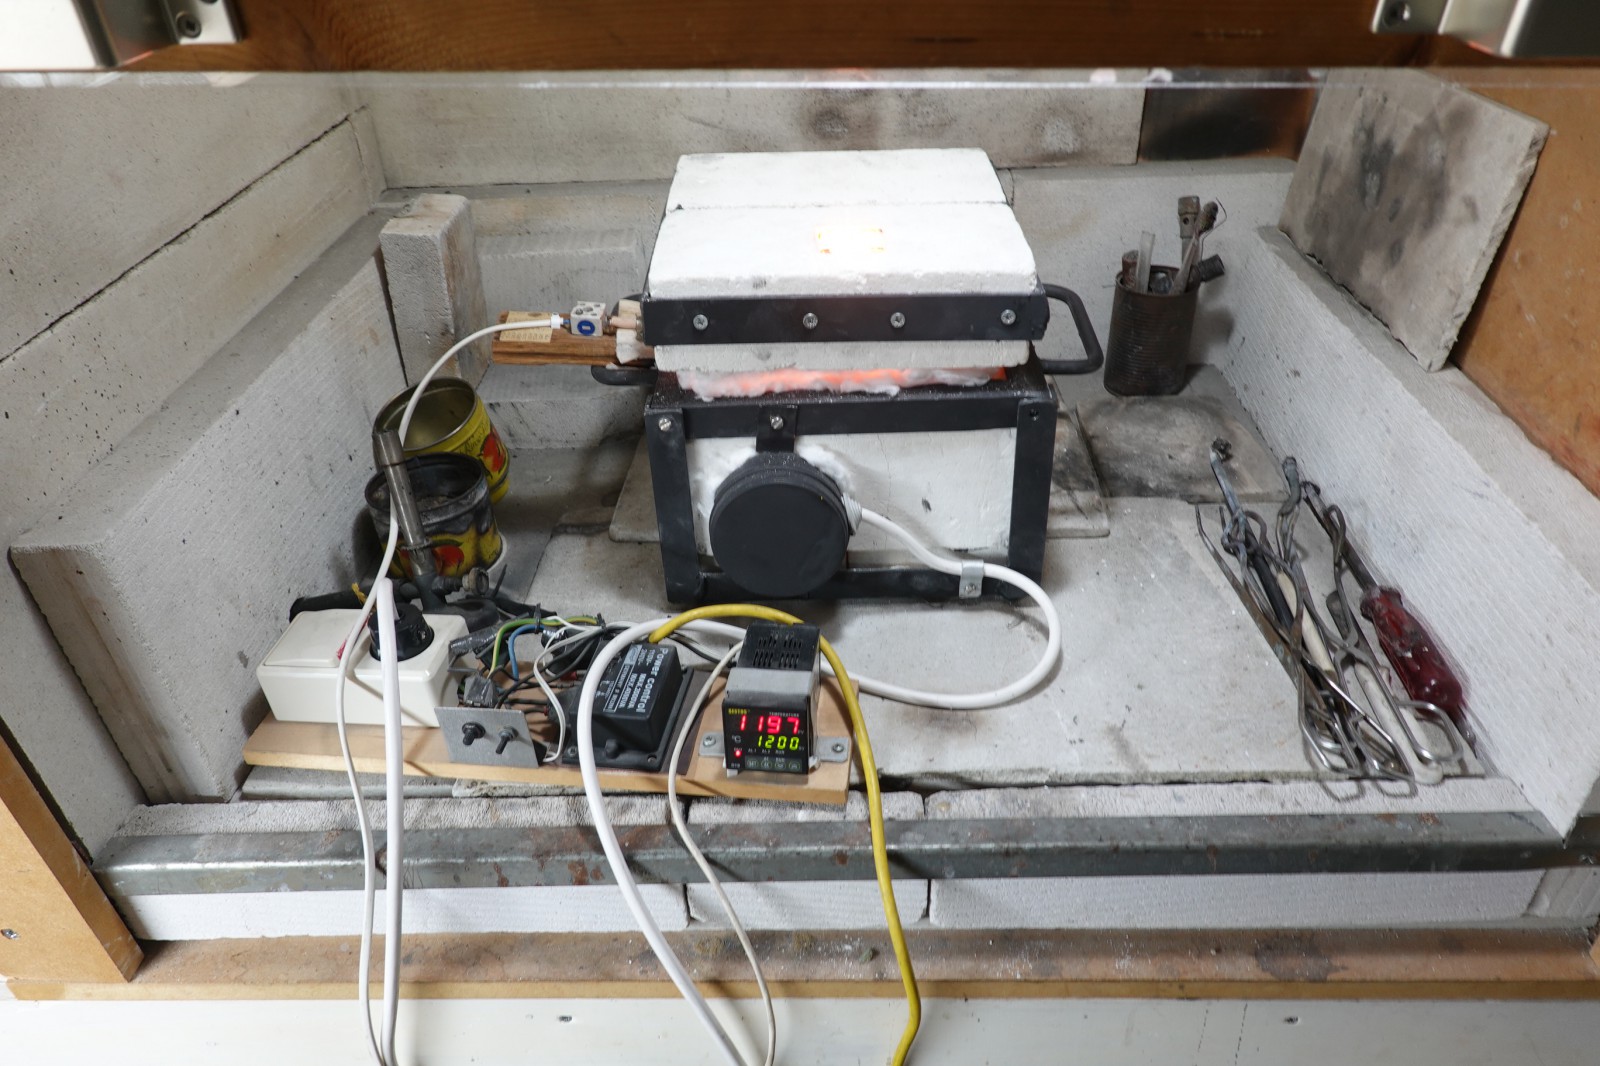
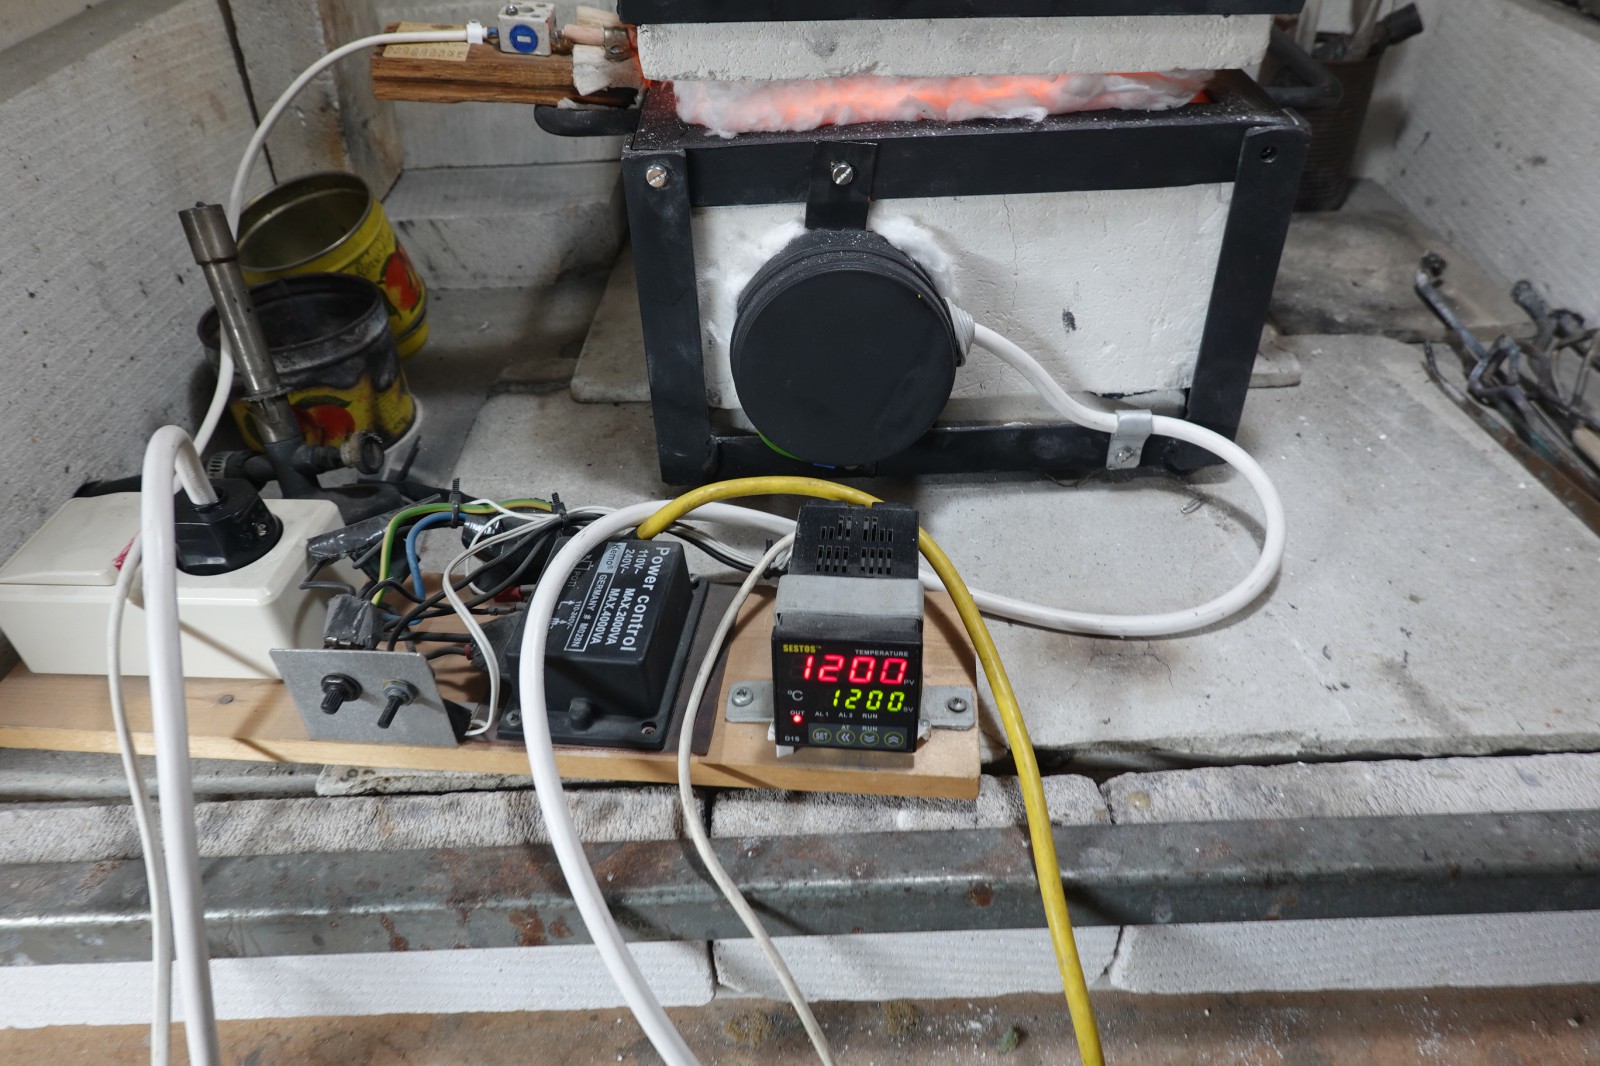
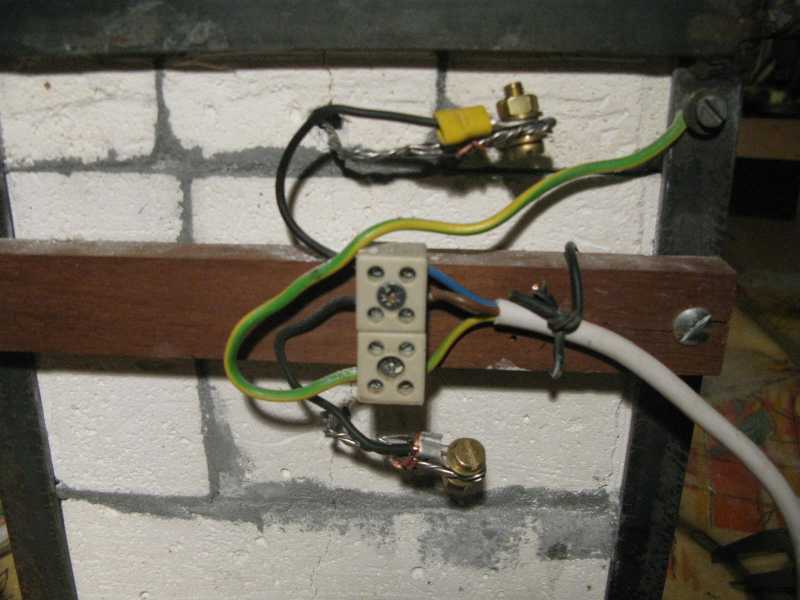
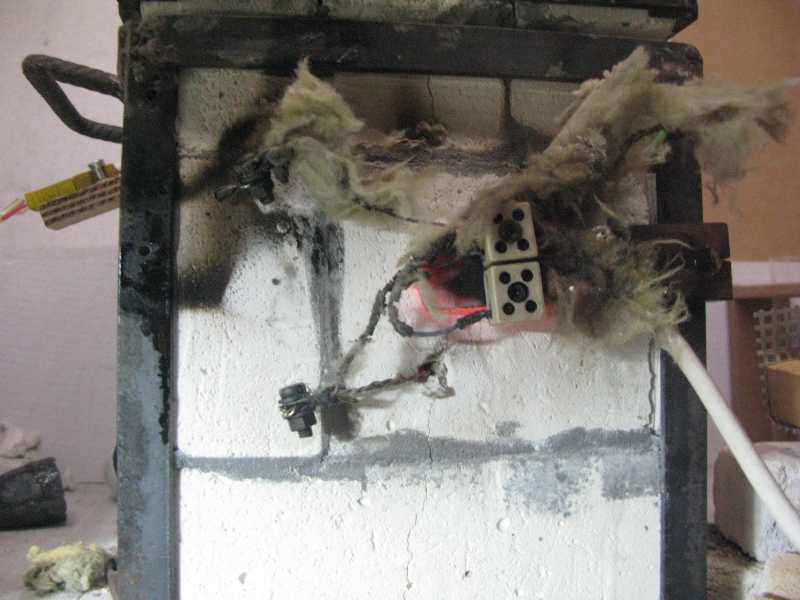
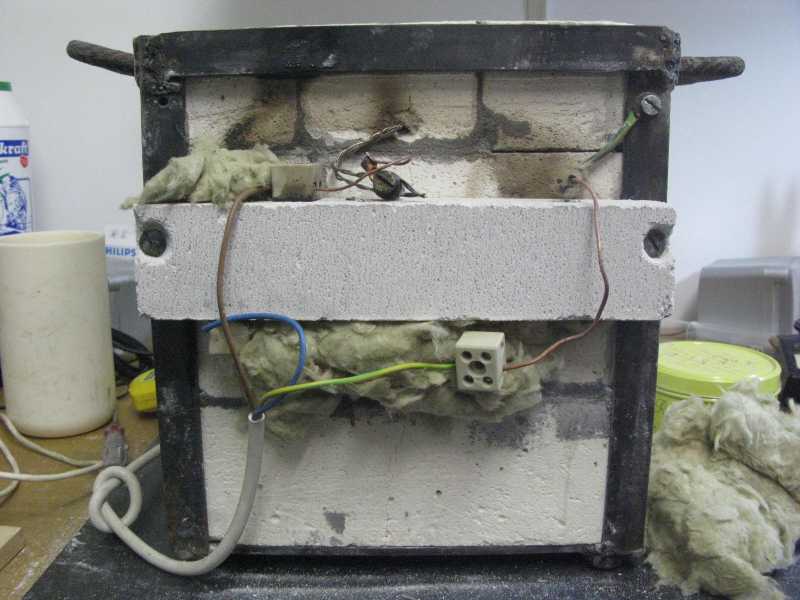
New furnaces rewired November 2010The mini furnace I made in October 2008 I retested and rewired with 1mm Kanthal A1 wire and the same I did with the larger 220V one. I bought a mew temperature controller via eBay from Sestos and a power controller from Kemo which allows up to 16A ohmic or inductive load (welder transformer ok). Those two combined I can connect the relay output of the temperature controller in series with the power controller potmeter so that the temperature switches between 'off'and 'conrtrolled on', i.e the furnace not at full power to prevent burnout. Both settings are adjustable but the 'off' current / power is always lower than the 'on'.On Nov 29 I put a graphite crucible with 40g copper in it within an alumina crucible of 72mm diameter and 150mm high to prevent contact with the wires. I set the current to 4.2 A in the 'on' setting and 2.5 A in the 'off' setting. It took more than an hour to heat it up to 1120°C but it kept remarkably close to that temperature, it kept between 1119 and 1126°C. The thermocouple was at the top so a little hotter than inside the crucible which was walled by the other alumina crucible. So melting copper in a propane fired furnace goes much faster (10 minutes) and costs all the way less energy. UPDATE After turning off the furnace I smelled charred wood. An hour later the smell was much stronger so I suspected pieces of wood on the front of the furnace for it. Yes it is stupid to use wood to mount the mains cable on. I didn't know that this could get so hot outside. The wood was completely charred, the insulation of the wires was gone. I have fixed that with Cellular concrate (YTONG) instead of wood, and I have wrapped the pastic insulations of the power cord in rockwool to prevent overheating. Test run on 2010 Dec 26 melting 33 grams of copper in the mini furnace.
|
||||||||||||||||||||||||||||||||||||||||||||||||||||||||||||||||||||||||||||||||||||||||||||||||||
|
Timelapse movie of heating up the larger furnace to 1100°C with a frame every 20 seconds. Click to play here If it does not show up your browser does not support H.264 videos. View the clip here. | ||||||||||||||||||||||||||||||||||||||||||||||||||||||||||||||||||||||||||||||||||||||||||||||||||

.jpg)
.jpg)
.jpg)
.jpg)
.jpg)
.jpg)
.jpg)
.jpg)
.jpg)
.jpg)
.jpg)
.jpg)
.jpg)
.jpg)
.jpg)


Powered, developed under Linux  and Mac
  and hosted under Linux.
This site is best viewed with Firefox, Safari, Chrome and Opera. Using landscape mode on a smartphone gives a better view.